Embroidery Backing Materials for Machine Embroidery: A Comprehensive Guide
Machine embroidery success relies not only on the design and machine, but also on using the right embroidery backing (also called stabilizer). Backing materials support the fabric during stitching, preventing puckering, distortion, and misalignment. Home embroiderers and small commercial shops have a wide variety of stabilizers available, each with specific characteristics. This guide covers all the major types of embroidery backings – tear. Away, cutaway, washaway, hea.away, adhesive (sticky), fusible, and other specialty options – explaining their strengths, limitations, and best uses. You’ll also find practical advice on matching stabilizer types to different fabrics, stitch densities, design complexities, and end uses (wearables vs. decor).
Why Backing Matters in Machine Embroidery
Embroidery backing is the foundation that keeps your fabric stable while thousands of stitches are added. Using insufficient or the wrong type of stabilizer can lead to problems like puckered fabric, distorted designs, broken threads, or embroidery that falls apart over time. By contrast, choosing the proper backing for your project and fabric ensures crisp, professional results and helps the embroidery hold up to wear and washing.
When selecting a stabilizer, consider these factors:
- Fabric type and weight: Stable woven fabrics (like canvas or denim) handle embroidery differently than stretchy knits (Tshirts or polos) or delicate sheers. Generally, lighter, thinner fabrics need heavier or more stable backing, while heavier, thicker fabrics can use lighter backing because the fabric itself provides support. Also, stretchy fabrics require a stabilizer that prevents stretch (usually a cutaway), whereas nonstretch fabrics can use temporary support.
- Stitch density and design complexity: Dense designs and those with lots of detail or small text exert more stress on the fabric. They need a strong, stable backing to maintain registration and prevent distortion. Lightweight or open, airy designs can sometimes use lighter stabilizer. As a rule, the higher the stitch count or detail, the heavier or more permanent the stabilizer should be.
- End use and laundering: For wearable items or projects that will be washed or handled often, choose a stabilizer that provides permanent support (or at least won’t fully disappear) so the design stays intact over time. For purely decorative items that won’t be washed or stretched (like a framed piece or wall hanging), you have more flexibility to use temporary stabilizers. Also consider whether leftover stabilizer will be visible or affect garment comfort – for instance, on a towel or sheer curtain you might not want any backing showing or remaining.
A common rule of thumb is: “If you wear it, don’t tear it.” In other words, use a cut away (permanent) stabilizer for wearable or stretchy items, and save tear away(removable) stabilizers for nonstretch fabrics or decor items. However, each stabilizer type has its own ideal applications. Let’s examine each category in detail.
Tear away Stabilizers

Tear away backings are temporary stabilizers designed to be easily torn off after the embroidery is complete. They are often made of paper like or nonwoven fibers that provide support during stitching but can be removed without leaving permanent material behind the design.
Characteristics: Tear away stabilizers range from lightweight to heavy. You hoop or position them behind the fabric, stitch your design, and then gently tear away the excess from around the embroidery. A good tear away will tear cleanly and easily, perforated by the needle penetrations. They do not stretch, offering firm support while intact, but once torn away, they leave no ongoing support except perhaps small fibers caught in the stitches.
Strengths of Tear Away:
- Easy Removal: They tear off quickly and cleanly, simplifying the cleanup. You can remove all visible traces of stabilizer from the back of the design, which is great for projects where you don’t want any backing left behind.
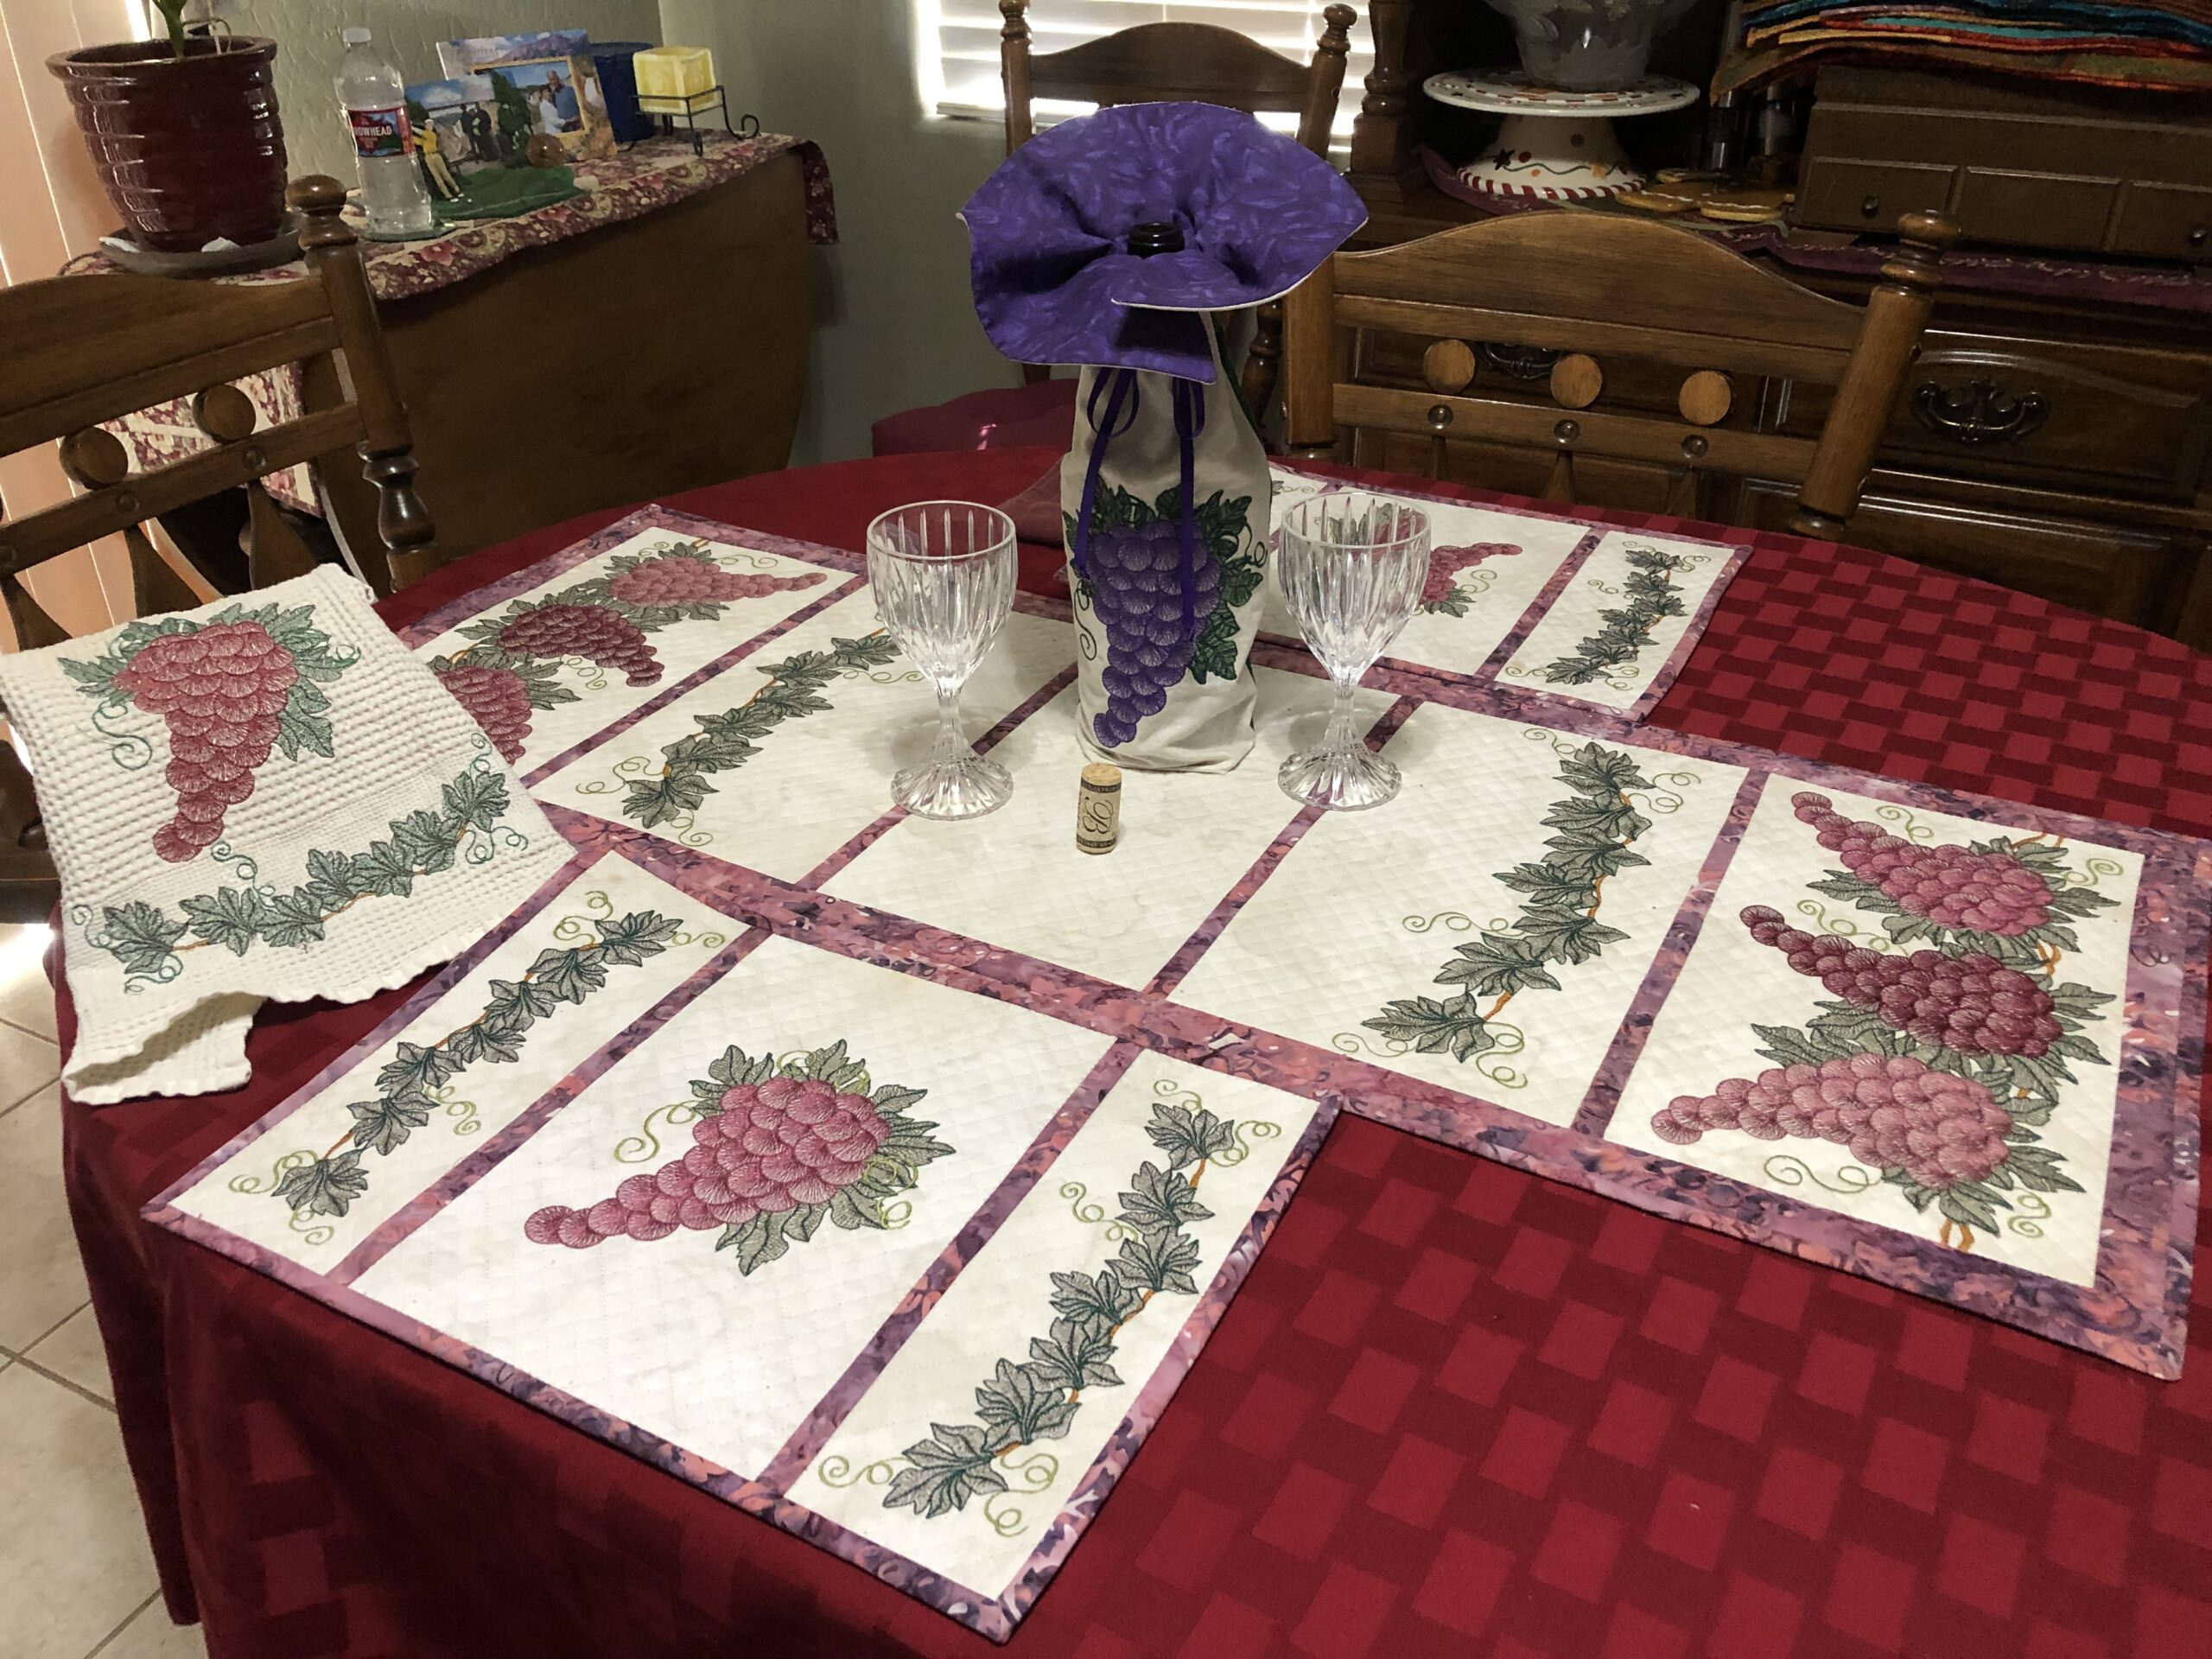
- No Permanent Backing: Because they’re removed, Tear Aways keep the back of the item soft and drapable. This is ideal for things like table linens or the back side of towels, where you want a clean finish without stabilizer remaining.
- Suitable for Stable Fabrics: On firm, nonstretch fabrics (e.g. cotton sheeting, canvas, denim, twill), Tear Aways provide enough support for many designs. The fabric’s inherent stability means a temporary stabilizer can be sufficient.
- Layering for Strength: If one layer isn’t enough for a high stitch design, you can use multiple layers of Tear Away. They’re thin and can be stacked; after embroidery, you tear each layer away. This layered approach gives more support during stitching but still allows complete removal.
Limitations of Tear Away:
- Not for Stretchy or Delicate Fabrics: Tear away is not recommended for knits or any fabric that stretches, because once removed, the stitches would have no support and could distort. Likewise, very delicate fabrics may deform when you pull the stabilizer off. The act of tearing can also stress the embroidery stitches if they are not well supported.
- Limited Long Term Support: Because all (or most) of it is removed, a tear away offers no permanent reinforcement. Designs on garments that will be washed repeatedly or stretched during wear may gradually warp or pucker without a stabilizer remaining. Also, some Tear Aways can deteriorate if left in through washings, so they are truly temporary.
- Design Density Constraints: Very dense or large designs can overwhelm a tear away stabilizer, causing it to perforate and tear before you finish stitching. If the needle penetrations are too close, the stabilizer may shred and fail midembroidery. Heavy designs usually need the stronger support of a cut away.
- Removal Challenges: While generally easy to tear, stabilizer remnants caught in tiny areas (like inside small letters) can be tedious to remove. You must tear carefully to avoid pulling stitches. Some higher quality Tear Aways tear more cleanly than cheap ones. Also, thick tear away stabilizers can be harder to rip and may tug on the stitches more.
When to Use Tear Away: Use tear away stabilizers on stable, woven fabrics that have little to no stretch. Common examples include canvas, denim, cotton quilting fabric, linen, twill, and similar materials. They are also a top choice for items where you want no stabilizer left after embroidery – for instance, the back side of a towel, the inside of a bag or hat, or any project where a visible backing would be unsightly. Tear Aways are perfect for home décor and crafts that won’t be laundered much (wall hangings, ornaments, patches that will be sewn on later, etc.). They work well for low to medium stitch count designs. For example, a simple monogram on a denim apron or a lightly stitched logo on a canvas tote could use a medium Tear Away. If using tear away on a thicker embroidery design, consider floating an extra piece of tear away underneath the hoop during stitching, then tearing it away layer by layer – this gives added stability without the need to switch to a cut away.
Always support the stitches with one hand while tearing away stabilizer with the other to avoid stressing the embroidery. Tear perpendicular to stitch lines when possible. If a tear awayis very hard to remove or is pulling the fabric, it may be too heavy (try a lighter weight or perforate it more before pulling), or you might need to switch to a different type for that project.
Cut away Stabilizers
Cut away backings are permanent stabilizers that remain on the garment or project after embroidery. They are typically nonwoven fibrous sheets (often made of polyester or rayon fibers) that do not tear, but instead must be cut away with scissors around the design. The portion directly under the stitches stays in place for the life of the item, providing continuous support.
Characteristics: Cut away stabilizers come in various weights (from very sheer to heavy duty). They are generally more fabric like and flexible compared to Tear Aways. After stitching, you trim the excess stabilizer roughly 1/8” to 1/4” outside the design outline. The stabilizer left under the stitching keeps the embroidery from stretching or distorting over time. Cut aways also typically have somewhat softer feel than Tear Aways (especially the light and medium weights), which is important since they remain on the garment.
Strengths of Cut away:
- Excellent Stability (Even for Stretch Fabrics): Cut aways are the strongest support because they don’t release from the fabric. They prevent stretching and shifting during embroidery and continue to stabilize the design during wear and laundering. This makes them ideal for knit fabrics (Tshirts, polo shirts, sweatshirts) and any material with stretch or drape. The motto “if it stretches, cut away” holds true – a cut away will keep a stretchy fabric like a knit or sweater from deforming under dense stitching.
- Supports High Stitch Counts: For dense, complex designs with lots of stitches or fine detail, cut away is often the best choice. It will hold the fabric flat and secure through thousands of stitches, maintaining registration so outlines and details line up perfectly. Even after trimming, the remaining stabilizer ensures the design keeps its shape. Small lettering and intricate embroidery come out sharper with a cut away because there’s no movement.
- Durability Through Washes: Because a cut away stays with the embroidery, it prevents the “puckering” effect you might see after washing a design that had only Tear Away. The backing helps the embroidery withstand agitation and prevents the stitches from pulling the fabric. Over many wash cycles, a good cut away will soften but not break down completely, so the design stays looking good.
- Variety of Weights and Types: Cut aways are available from sheer/lightweight (for thin, light colored fabrics) up to heavyweight (for very dense designs or unstable fabrics). This range allows you to choose sufficient support without excess bulk. There are also no show mesh versions (see Specialty section) that are thin and translucent, great for light garments. Some cut aways are fusible (iron on) for extra stability (addressed in the Fusible section). The versatility means you can often find a cut away to suit your project’s needs.
Limitations of Cut away:
- Remains on the Garment: The obvious trade off is that you cannot completely remove a cut away. The excess can be trimmed, but a layer will always remain under the stitching. This can be a problem for very sheer fabrics (you’ll see the stabilizer through semi transparent fabric), or in cases where the back side is visible and appearance matters (like lace table runners or organza scarves). In such cases, a wash away might be preferred to avoid any visible backing.
- Potential Bulk or Stiffness: A heavy cut away can make the embroidered area a bit stiff. On lightweight garments, even a medium cut away will add some firmness to that patch of fabric. This is usually acceptable (and necessary for stability), but on very thin, drapey fabrics the stabilizer’s feel might be noticeable. That’s why light mesh cut aways were developed for tees and blouses. Also, the edges of cut away left on the back can sometimes be scratchy if a poor quality stabilizer is used (higher quality ones are softer), though you can cover them with a soft fusible tricot after embroidery if needed.
- Trimming Required: Removing a cut away is more time consuming than tearing a stabilizer. You must use scissors to trim around the design. Care is needed to avoid cutting the garment. This isn’t a major drawback, but it adds a step. Fine embroidery with many interior open areas (like inside letters “O” or between design elements) may require careful trimming with small scissors.
- Not Ideal for One time Use Items: If you’re doing a project that truly doesn’t need permanent support (say a single use banner or something that won’t ever be washed or stretched), a cut away might be overkill since it remains. However, in most cases using cut away “just in case” won’t hurt – it only means you’ll have backing left that perhaps wasn’t strictly necessary.
When to Use Cut away: Use cut away stabilizer for any fabric that has stretch or give, including knit fabrics (cotton knits, jersey, interlock, pique polos, sweatshirt fleece, sweaters) and even loosely woven fabrics that could distort. It’s the go.to for wearable garments because they will be flexed and washed. For example, embroidering a logo on a polo shirt absolutely calls for cut away backing so the design stays crisp after many wears. Similarly, stitching names on a stretchy baby blanket or doing a dense design on a sweatshirt – cut away will ensure the embroidery doesn’t rip or wrinkle later.
Also use cut aways for large or high density designs on any fabric. If you have a heavily filled embroidery design (high stitch count) or detailed scene, even on a reasonably stable cotton, a cut away will hold everything in alignment better than a Tear Away. Cut away stabilizer is also commonly used on unstable materials like vinyl or leatherette that might rip with tear away removal – though those materials don’t stretch, they benefit from the gentle trimming of cut away.
In summary, cut away stabilizers are the workhorse for most embroidery that needs to last. For an intermediate embroiderer, it’s wise to keep various weights of cut away on hand. A medium weight (2–2.5 oz) cut away is a great general choice for many garment projects. You can use a single layer for moderate designs, or double it for extra heavy designs (or use one layer of heavy cut away). If worried about show through on light fabric, choose a no show mesh cut away which is very thin but still provides permanent support.
Tip: After finishing embroidery, trim the cut away as neatly as possible. Leave a margin around the stitches – don’t cut right up to the threads, as that can undermine the support. Over time, the cut away’s edges will soften. If the garment will be worn against the skin (like a T shirt), you can iron on a lightweight fusible tricot or specially made “cover up” backing over the cut away to cover the scratchy edges and threads for comfort.
Wash Away Stabilizers (Water.Soluble)
Wash Away stabilizers are a unique category that dissolve in water, leaving behind little to no trace. These are also called water soluble stabilizers. They can be used as a backing or as a topping, and are typically either a clear thin film or a fibrous, fabric like stabilizer that looks similar to a lightweight cut away but will completely wash out.
Characteristics: Water soluble stabilizers come in different forms:
- Film type (plastic like) Wash Away: Often clear or translucent and sold under names like AquaFilm or Solvy. This feels like a thin plastic sheet. It’s commonly used on top of fabrics as a topper for certain projects (more on topping below), but can also serve as a backing for very delicate work.
- Fibrous Wash Away: This looks more like a soft, opaque mesh or paper. It hoops more easily and provides more support than the film type. It’s used as a backing for stitching freestanding lace or embroidering on very sheer fabrics, etc. It provides stability while dry but dissolves when immersed in water.
All Wash Aways share the trait that water (or heat/steam in some cases) will remove them entirely. After embroidering, you cut away the large excess, then wash the project in water (or rinse the area) to dissolve the remaining stabilizer, even the bits under the stitches. The result is no stabilizer left at all.
Strengths of Wash Away:
- Leaves No Residue: The biggest advantage is that after removal, nothing remains on either side of the project. This is essential for certain applications – for example, making freestanding lace, where you want the stitched lace to stand alone with no backing visible, or cutwork and open embroidery where the backing must vanish leaving only the design on fabric. It’s also great for very sheer fabrics (like organza, netting, tulle) where even a sheer mesh cut away would be visible; a Wash Away can stabilize during stitching and then be washed out completely so the sheer fabric remains transparent.
- Ideal as Embroidery Topping: Wash Away films are often used on top of high pile or textured fabrics (like towels, terry cloth, fleece, corduroy) as a topping. The clear film sits on the fabric’s surface and prevents stitches from sinking into the nap or getting lost in the texture. Once the design is done, you gently tear away the excess topping and rinse off the rest with water. This leaves the embroidery nice and crisp on the fabric’s surface. While topping isn’t exactly “backing,” it’s a related stabilizer use, and water soluble is the go.to for that purpose because it comes off without a trace.
- Good for Special Techniques: Besides lace and cutwork, Wash Away stabilizers allow creative techniques like reverse appliqué, embroidering patches or emblems that you then soak to separate them from the hooping base, or quilting techniques where you want to stitch through stabilizer and have it disappear later. For example, if you embroider on organza backed with a Wash Away, you can create standalone embroidered motifs. It’s also used when stitching on certain edibles (like sugar veil or chocolate transfer sheets in edible embroidery) – those unusual cases aside, any time you need temporary support that absolutely must go away, water soluble is the answer.
- Various Weights for Versatility: Wash Aways come in different thicknesses. Lightweight films are perfect as topping or for low stitch work, while heavier fabric like water soluble backings (sometimes called Wash Away mesh) can support surprisingly stitch heavy designs like lace. You can even double up layers for more support and they will all still dissolve later. This means you can tackle a range of projects by adjusting the number of layers or type of Wash Away.

Limitations of Wash Away:
- Sensitivity to Environment: Because they dissolve in water, these stabilizers are vulnerable to moisture. High humidity can make them gummy or make a roll of stabilizer start to soften. They also can dry out and get brittle if exposed to air for too long. You have to store water soluble stabilizers in airtight bags or containers and use them before they get old. If they become brittle, they may crack while hooping; if too soft, they may start dissolving from the moisture of your hands. Careful storage is a must.
- Limited Hooping Strength: Especially the film type Wash Aways have poor resistance to tension. If you hoop them alone, they may tear or pop in the hoop from the stress. Often it’s recommended to use a double layer, or if using as a backing on something like tulle, baste the fabric onto the stabilizer to distribute tension. The fibrous Wash Aways are stronger than the film type, but none are as robust in the hoop as a comparable weight cut away or Tear Away. This means for very stitch dense designs, even a heavy Wash Away might struggle to hold up without tearing. They are best for designs intended to be self supporting (like lace which builds a structure of stitches that hold together once stabilizer is gone).
- Not for Permanent Support: By definition, Wash Away stabilizer completely vanishes. So you cannot use it for a project that needs ongoing stabilization after embroidery. For instance, you wouldn’t normally back a stretchy T shirt design solely with Wash Away, because after you launder it, the stabilizer will be gone and the embroidery could warp. (One possible exception is if the design is extremely light or a running stitch that doesn’t really need support later, but that’s rare for wearables.) In short, Wash Aways are intended for temporary use; if the fabric or design requires support long term, another stabilizer should be used instead or in combination.
- Extra Step to Rinse Out: Removing a Wash Away means wetting the project. This adds a step – you have to soak or rinse the item to fully dissolve the stabilizer, then let it dry. This can be a concern if the fabric or item isn’t washable or if the thread used is not color fast. Also, you need access to water and drying facilities, so it’s not as immediate as tearing off a stabilizer. In some cases, you can just mist or dab water to dissolve small areas, but generally a good rinse is needed to avoid any stiff residue.
When to Use Wash Away: Choose a Wash Away stabilizer whenever no stabilizer must remain on the project. The classic use is freestanding lace embroidery – here you would hoop one or two layers of a fibrous Wash Away stabilizer, stitch a dense lace design (the stabilizer holds it during stitching), then soak it so that only the lace thread remains, looking like old fashioned handmade lace. Similarly, for cutwork embroidery (designs that involve cutting away the fabric to leave holes or open areas), you use Wash Away so that the parts under the cut sections disappear after you finish the embroidery and rinse it.
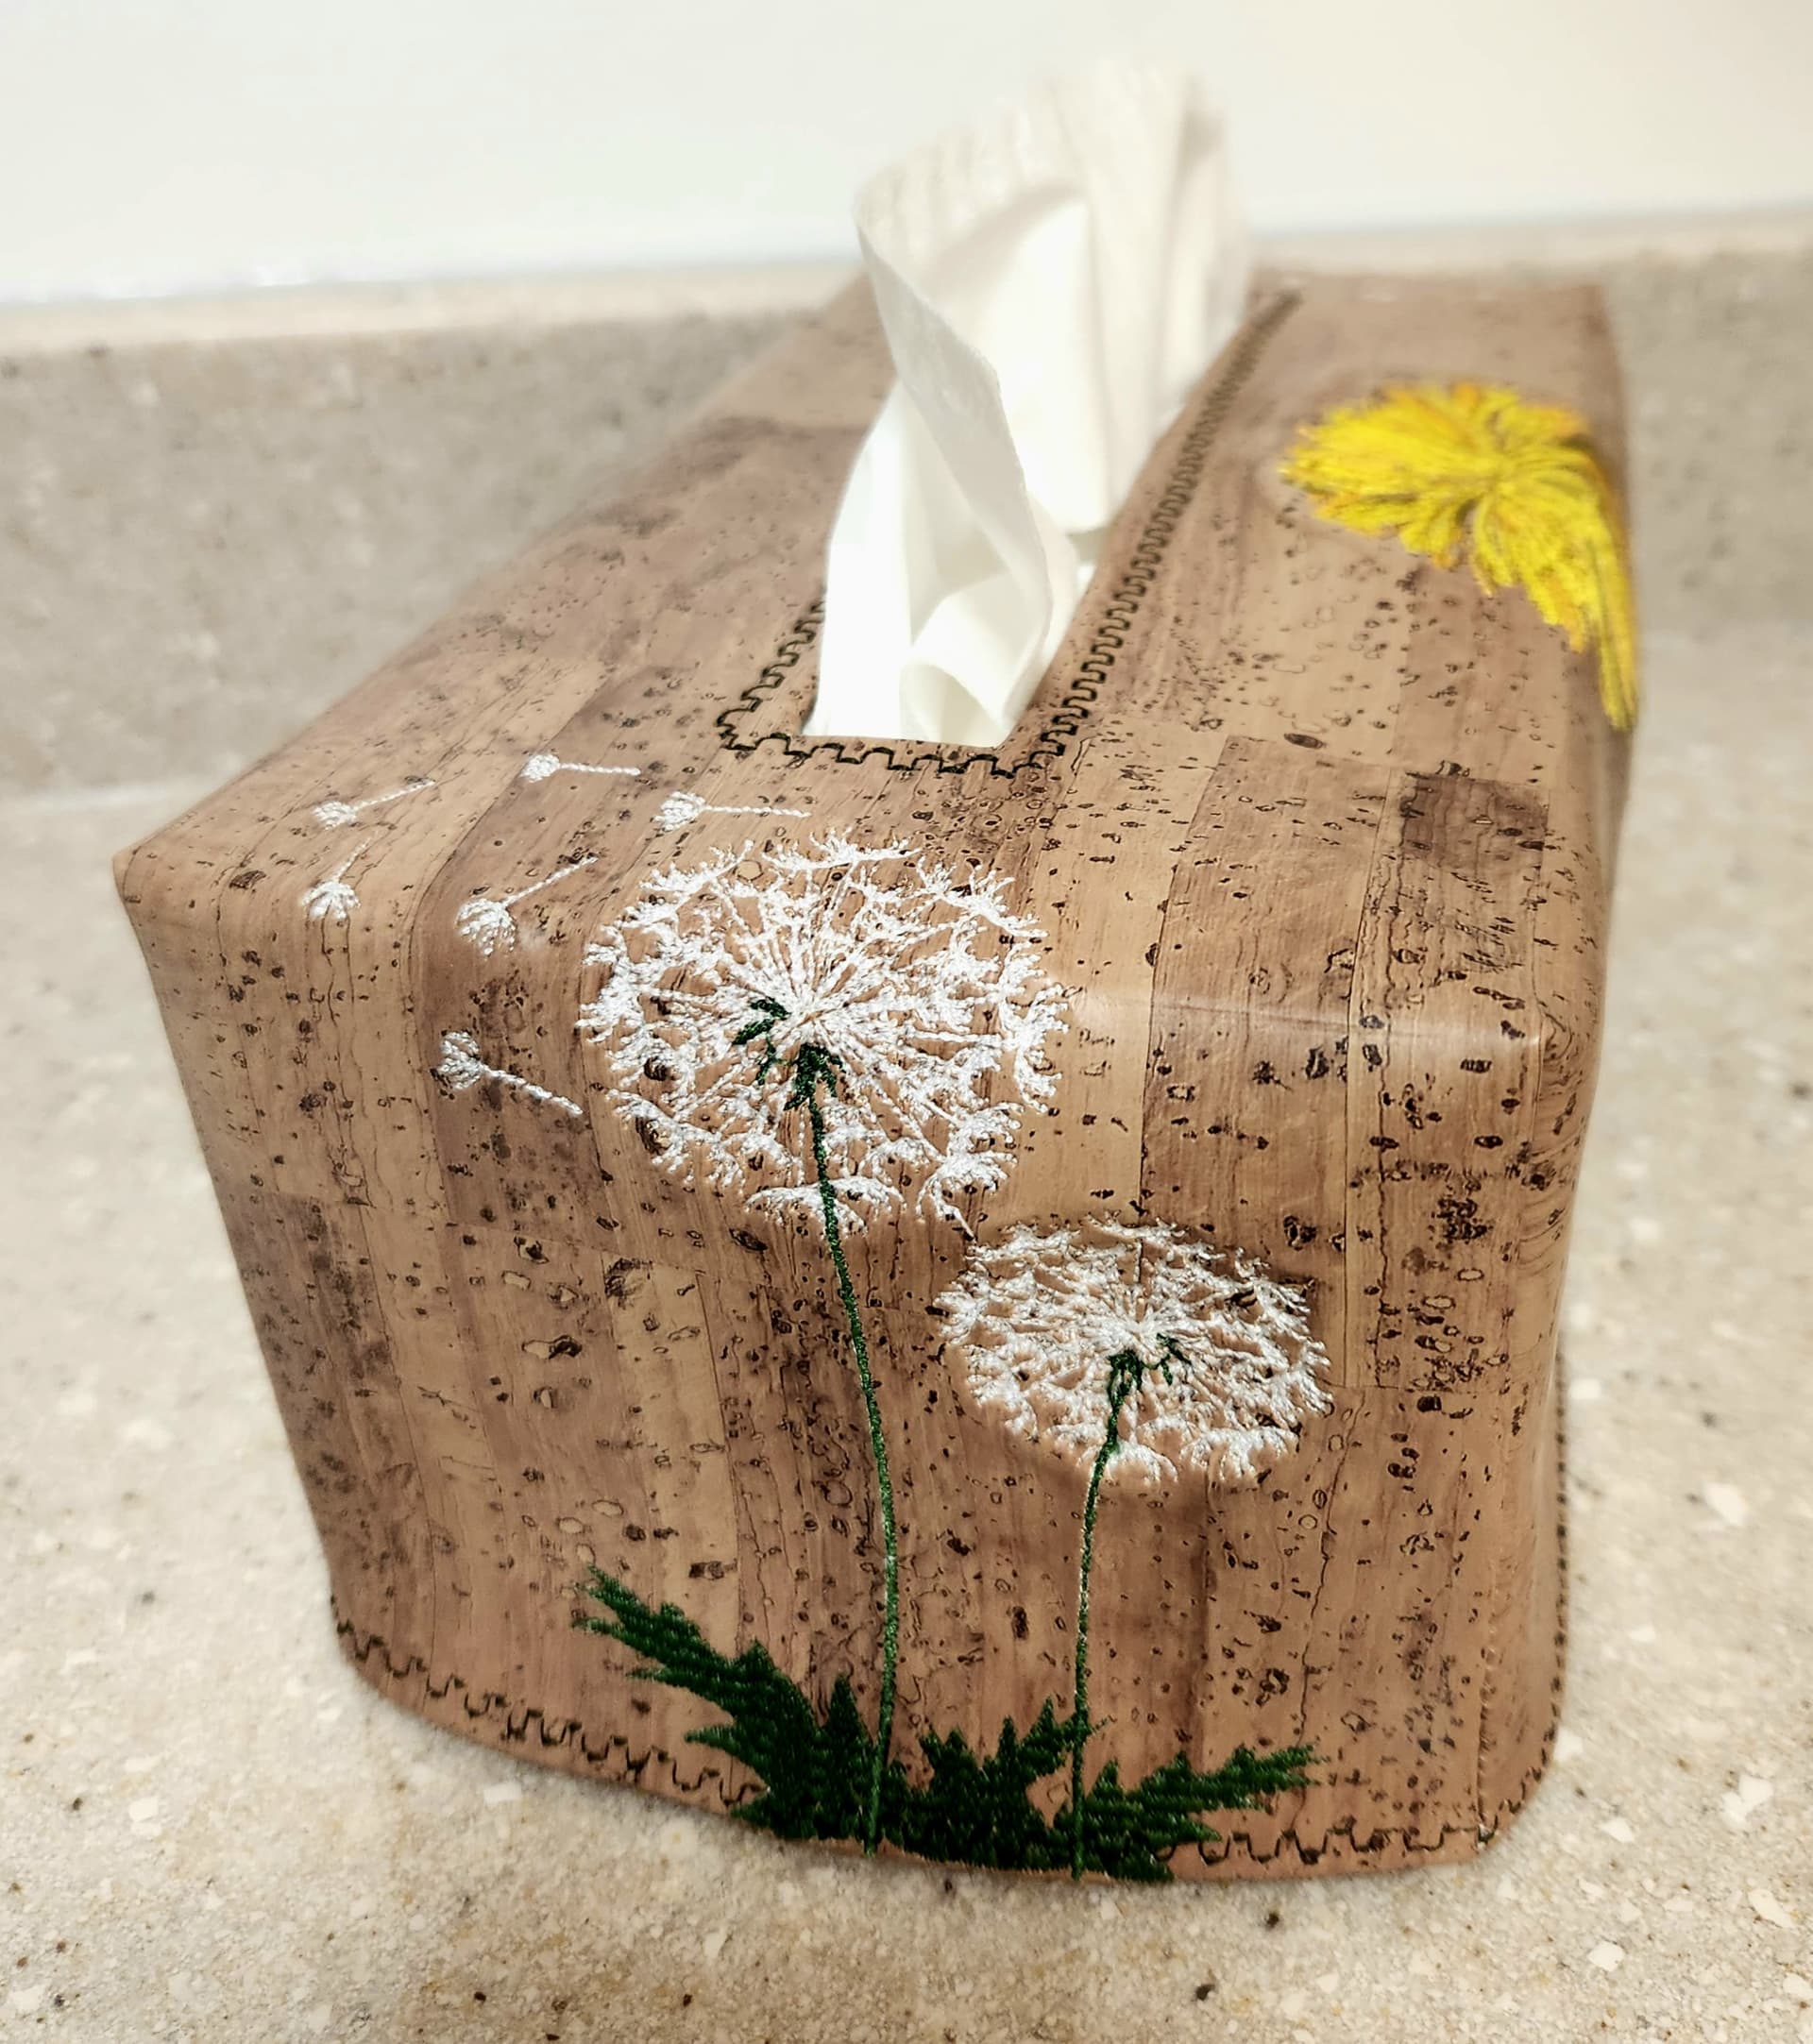
Another frequent use is as a topper on towels, fleece, and plush fabrics. If you embroider a towel without topping, the stitches may sink into the loops; a piece of Wash Away film on top ensures the stitches sit up on the surface. After stitching, rip off the big pieces and wash out the rest – the topping is gone, and the towel is soft and usable with nicely defined embroidery.
You might also use Wash Away stabilizer for sheer or light fabrics like organza, chiffon, or bridal tulle, where any remaining stabilizer would mar the see through quality. For example, if you want to embroider a monogram on fine lace or a sheer veil, you could use a Wash Away mesh as backing so that once it’s dissolved, the embroidery appears to float on the sheer fabric with no backing visible.
In some cases, embroiderers use a layer of Wash Away along with another stabilizer: for instance, layering a Wash Away on top of a knit can serve as both a temporary topper and then wash out, while a cut away beneath handles the long term support. Or using a Wash Away on bottom and top for tricky fabrics like sweater knit (one underneath for stabilizing stitches that later dissolves to keep the knit soft, and one on top to keep stitches from sinking).
Remember to test that the fabric and thread can be safely washed (even if just a rinse) before using Wash Away. If not, a heat away stabilizer (next section) might be an alternative.

Heat away Stabilizers
Heat away stabilizers (also known as heat soluble or melt away stabilizers) are a less common type of temporary stabilizer that are removed by the application of heat rather than water. They are useful for projects where water removal is not practical, and they leave no fibrous residue after removal if used correctly.
Characteristics: Heat away stabilizers typically look like a very thin, opaque film or paper. Some feel slightly crispy. They are hooped or used like other stabilizers during embroidery. To remove, you apply a dry heat source such as an iron, pressing cloth, or heat press. Under the heat, the stabilizer either melts, scorches to an ash like powder, or becomes brittle so it can be brushed away. Different brands have different removal behaviors – for example, one kind might crumble to powder when heated, while another might stick lightly and then release.
The key is that they require no water for removal, which is great for fabrics or items that can’t get wet. After heating, you gently rub or brush off the stabilizer remnants, and nothing substantial remains on the fabric.
Strengths of Heat away:
- No Water Needed: The primary advantage is you can completely remove the stabilizer without washing the project. This is valuable for items that are not washable or shouldn’t get wet – such as delicate fabrics that water would stain or shrink, or projects like a fabric that’s already framed or glued to something that can’t be soaked. Also, if you’re in a situation without easy access to water or you need the item to be dry immediately (say, you’re doing on the spot personalization at an event), Heat away offers a dry removal method.
- Clean Finish: Like Wash Aways, a properly used Heat away leaves no obvious backing behind. This makes it useful for openwork designs, lace, or sheer materials, similar to the applications of Wash Away. Once removed, the stabilizer is gone without a trace, so the embroidery’s back side is clean and the drape of the fabric is unaffected.
- Special Fabric Applications: Heat away stabilizers are sometimes recommended for fabrics that can’t be wetted. For example, certain luxury fabrics (some silks, velvets) water might spot or distort. Or maybe you’re embroidering on paper or card stock for a craft and can’t soak it – a Heat away could stabilize during stitching and then be removed with an iron’s heat, whereas water would ruin the paper. They are also useful in heirloom techniques where the material must stay dry.
- Good for Small Areas: Heat away stabilizer can be great for small embroidery areas or emblems where cutting or tearing would be fiddly. For instance, if you floated a small piece under a tiny embroidery, you can later just zap it with an iron tip to remove it instead of trying to tear out little bits.

Limitations of Heat away:
- High Heat Requirement: Removing these stabilizers needs fairly high heat (often a cotton setting on an iron). This obviously can be a problem on heat sensitive fabrics. Materials like nylon, polyester, spandex, or certain delicate silk may scorch, melt, or deform under the required temperature before the stabilizer does. So the fabric or thread must be able to withstand the heat. You often must use a pressing cloth and be very careful. If your item can’t take the heat, you can’t use a Heat away on it.
- Residual or Scorch Risk: If not done carefully, you might get some residue. Some Heat away products, if overheated, can leave a slight film or shiny spot on the fabric. There’s a bit of a learning curve to heating just enough to remove stabilizer but not so much that you scorch the stabilizer into the fabric or burn the fabric itself. You also need to brush away or wipe off the ashy residue afterward, which can be messy. In rare cases, a very thick design might trap bits of stabilizer under stitches that don’t fully disappear with heat application.
- Less Readily Available: Heat away stabilizers are not as commonly found in general craft stores as Tear Away, cut away, or Wash Away. They might require purchasing from specialty suppliers. Many embroiderers, even experienced ones, might not use Heat away often because Wash Away or other methods suffice for most projects. This means fewer options and possibly higher cost.
- Hooping Strength: Much like Wash Away films, Heat away stabilizers can be relatively delicate. They usually work best with lighter designs or in combination with other stabilizers. If you have a high stitch count design that also needs a vanish without trace stabilizer, you might use two layers or use a combination (like one layer of cut away plus a layer of Heat away on top just to prevent needle drag and then remove the Heat away… though that leaves the cut away, defeating the ‘no trace’ purpose). Generally, Heat away is chosen for specific cases rather than as a general heavy duty stabilizer.
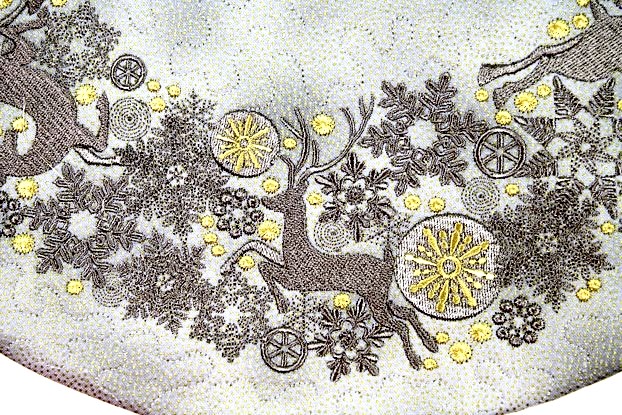
When to Use Heat away: Consider a Heat away stabilizer for projects that cannot be washed or get wet, but still require a stabilizer that disappears completely. For example, imagine embroidering on a velvet Christmas stocking: you don’t want to wash it (wetting velvet is problematic) and you don’t want cut away left inside that might show or affect the drape. A Heat away could be hooped with the velvet, used to stabilize a monogram, then removed with a warm iron so the velvet remains plush with no stabilizer bits. Another scenario: paper crafting with embroidery – say you stitch a design onto cardstock for a card or paper ornament. You could use a Heat away as the backing, then iron the paper between two pieces of pressing cloth; the stabilizer will vanish without soaking and warping the paper.
Heat away can also be used similarly to Wash Away for lace or applique if the fabric or environment doesn’t allow water. For instance, some costumers use Heat away for lace on fabrics that are water sensitive. Freestanding lace could theoretically be done on Heat away and then removed with an iron, though most people use water soluble for that.
Always test a Heat away product on a fabric scrap first to make sure the iron temperature needed won’t damage your material. Use a pressing cloth (like muslin or parchment paper) between the stabilizer and iron to prevent any melted stabilizer from sticking to your iron. Gently move the iron or apply it in quick presses rather than sliding (to avoid smearing anything). Once the stabilizer turns powdery, let it cool a second and brush it off. With practice, Heat away removal can be very effective.
In summary, Heat away stabilizers fill a niche need: dry removal. If your project can tolerate heat and not water, it’s a great solution. Otherwise, many embroiderers stick to Wash Away for similar effects, or cut/tear if some residue is acceptable.
Adhesive and Sticky Stabilizers
Sometimes the challenge in embroidery is securing the fabric rather than stabilizing its fibers. Adhesive backed stabilizers (also called sticky stabilizers) are designed to stick to the fabric, holding it in place during embroidery without traditional hooping of the fabric itself. These can come in Tear Away, Wash Away, or even cut away varieties, but their defining trait is an adhesive surface.
Characteristics: Adhesive stabilizers typically have a paper release sheet on one side. You hoop the stabilizer with the paper side up, then score and peel away the paper to expose a sticky surface (much like a sticker). You then press your fabric or item onto this glue surface, which holds it firmly while you stitch. Some adhesive stabilizers are pressure sensitive (sticky to touch) and others are water activated (dry until you wet them slightly to get stickiness). In addition to pre adhesive stabilizer products, many embroiderers achieve a similar result by spraying temporary fabric adhesive onto a piece of regular stabilizer – however, using a purpose made sticky stabilizer gives a more even adhesive layer and can be less mess.
Adhesive stabilizers are usually tear away or Wash Away base material, since the goal is often to remove them cleanly after embroidery. For example, a common type is sticky Tear Away: a medium weight tear away with one sticky side. There are also sticky Wash Away (water soluble stabilizer with adhesive). Adhesive cut away exists (often as fusible, which is a type of adhesive too), but peel and stick cut away is less common because if you need permanent support you usually can hoop the item; still, some specialty cut aways have adhesive for tricky materials.
Strengths of Adhesive Stabilizers:
- Hoop Difficult Items: The biggest advantage is being able to embroider items that cannot be easily hooped in the usual way. Small, odd shaped, or delicate things like caps, cuffs, baby clothes, socks, collars, ribbon, or even paper – you can stick them to the stabilizer rather than trying to clamp them in a hoop. The stabilizer holds them flat during stitching. This opens up embroidery possibilities on items that would otherwise be too awkward or too small to hoop (for example, monogramming a fabric purse flap or a shoe tongue using sticky stabilizer).
- No Hoop Marks or Shifting: Delicate fabrics that would get hoop burn (permanent marks or crushing from the hoop) also benefit. For instance, velvet, suede, leather, satin – these can be damaged by hooping pressure. Instead, hoop a sticky stabilizer and smooth the fabric on it. The fabric isn’t physically clamped, so no hoop ring or shine. And because it’s glued down over the whole area, the fabric is less likely to shift or stretch during embroidery compared to just floating a piece of fabric on top of stabilizer without adhesive.
- Convenience and Precision Placement: Adhesive stabilizers make it easier to position the embroidery exactly where you want it. You can draw crosshairs or guides on the release paper, hoop it, then align your garment on the sticky area perfectly. If you need to rehoop or adjust, many sticky stabilizers allow some repositioning. They’re also great for patches or applique pieces – you can stick a small fabric piece onto the stabilizer in the hoop to embroider an applique shape or patch without it shifting at all.
- Minimal Residue (with quality products): Good quality embroidery adhesive stabilizers are formulated to minimize gummy buildup on needles and residue on fabric. They hold well during stitching but release relatively cleanly. Water activated adhesive stabilizers have the advantage of leaving no stickiness on the item at all (the adhesive either stays on the stabilizer or washes out). Using these can be cleaner than spraying temporary glue everywhere. In the end, you tear or dissolve away the stabilizer, and the project is free.
Limitations of Adhesive Stabilizers:
- Needle Gumming: Lower quality sticky stabilizers or overuse of adhesive spray can cause the sewing needle to accumulate glue residue. This can lead to thread breakage or skipped stitches. Even with good products, long runs of embroidery might still get some gumming, so you might need to pause occasionally to wipe the needle with alcohol. This is a known drawback of adhesive methods – they add maintenance and can affect stitch quality if not managed.
- Less Hooping Tension = Less Stability: When you rely on adhesive alone, the fabric isn’t held taut by the hoop’s tension. The stabilizer is taut in the hoop, and the fabric is stuck to that stabilizer. For lightweight fabrics or low stitch counts, this is fine, but for heavy designs the fabric could still shift slightly or the adhesive might not hold perfectly against strong push pull forces of embroidery. There’s a risk the fabric can lift or bubble if the sticky isn’t strong enough. For this reason, sticky stabilizer is often recommended for lighter stitch designs or as a supplement (you can always float a piece of non adhesive stabilizer underneath for extra support in the middle of stitching if needed).
- Residue on Fabric: In some cases, the adhesive can leave a mark or sticky feel on the fabric after the stabilizer is removed. For example, very plush fabrics or loosely woven ones might retain some bits of adhesive. Usually gentle washing removes it, but it’s something to watch out for on fine materials. Also, if a garment is left stuck to a stabilizer for too long (days), adhesive might transfer. It’s best to remove it promptly after stitching.
- Cost: Adhesive stabilizers tend to be more expensive per sheet/roll than standard ones. Also, because you often use them one time (they lose stickiness after one use, generally), the cost per project is higher. Some embroiderers reserve sticky stabilizer for special cases and use hooping or basting for more common projects to save money.
- Handling and Waste: Sticky stabilizer can be a bit of a hassle to handle – the large sticky area can accidentally stick to things you don’t want (your table, your shirt, itself folding over). It can also gum up scissors when trimming away. Additionally, once you peel off the paper, that stabilizer piece will eventually dry out if not used, so you have to store partial sheets carefully. The peeled off release paper is just waste. These are minor issues but notable when working with adhesive products.
When to Use Adhesive/Sticky Stabilizer: Use adhesive stabilizers whenever you have an item that is too small or impractical to hoop, or a fabric you shouldn’t clamp. For example:
- Caps and hats: In home embroidery, flat hoops struggle with curved cap brims. Instead, many embroiderers hoop a piece of sticky tear away and then press the cap’s front onto it, smoothing it flat. The design is then stitched and later the stabilizer is torn away from inside the cap.
- Dense pile or nap fabrics: While you might still use a standard tear away for a towel, using a sticky tear away can help hold the towel in place without hooping it (preventing hoop crush). It also helps keep plush fabric from shifting. You would use sticky tear away underneath and a Wash Away topping on top for a perfect towel embroidery setup.
- Very slippery fabrics: Silks, satins, lightweight synthetic sheers – these tend to shift if just hooped normally, and hoop pressure can damage them. Sticking them to stabilizer holds them firmly in place with an even pressure. For instance, to embroider on a silk ribbon or a piece of organza, you could use a sticky Wash Away stabilizer to both hold it and then easily remove every trace later.
- Awkward shapes and hard to hoop sections: Want to add a little embroidery to a shirt cuff, a sock, or the corner of a napkin? With traditional hooping, the remaining fabric can get in the way or it’s impossible to hoop just that small area. Sticky stabilizer lets you hoop only the stabilizer, then press the target area of the item onto it, keeping the rest of the item out of the way. This is extremely useful for things like pockets (stick the pocket area down, and keep the pocket lining flipped out so you don’t stitch it closed by accident).
- Multi hooping or continuous designs: If you need to rehoop multiple times to create a border or line up designs, sticky stabilizer can help keep the fabric aligned between hoopings. You can even draw alignment marks on the stabilizer and re stick the fabric for the next section of embroidery.
- Hoopless embroidery method: Sometimes very thick or rigid items (like a heavy quilt sandwich or a canvas bag) cannot be hooped at all. The “hoopless” method is to hoop only a sticky stabilizer, then press the bulky item onto it. You may also secure with pins around if needed. The embroidery is done effectively without hooping the item itself.
In practice, many embroiderers keep sticky tear away on hand for general use and possibly a sticky Wash Away for when they need complete removal (for instance, sticking down a lightweight fabric but later dissolving the stabilizer to avoid any tearing). Be mindful to use a new needle or clean the needle after using adhesive stabilizers if you notice any residue. A silicone.coated embroidery needle can also help reduce gumming.
Fusible (Iron On) Stabilizers
Fusible stabilizers have a built.in adhesive that is activated by ironing the stabilizer to the fabric before you embroider. This category isn’t a separate stabilizer material by itself – rather, fusible versions exist for many types of stabilizers (fusible cut away, fusible Tear Away, etc.). The benefit is that the stabilizer is temporarily bonded over the entire fabric area, preventing shifting, stretching, or puckering during hooping and stitching.
Characteristics: A fusible stabilizer has one side coated with a heat. Activated glue (often it has a slightly shiny or textured appearance on that side). To apply, you place the rough or shiny side against the wrong side of your fabric and use an iron (typically a low to medium heat, depending on product instructions) to melt the adhesive. It usually only takes a few seconds of pressing. The stabilizer then sticks to the fabric like an interfacing. You can then hoop the fabric and stabilizer as one, or even embroider without hooping the fabric if the piece is small (since it’s stuck to the stabilizer which can be hooped).
After embroidery, fusible stabilizers are removed in the same way as their non.fusible counterparts: tear awayfusibles are torn off, cut away fusibles are trimmed, etc. The fusible coating’s residue, if any, remains on the stabilizer that’s left or comes off with it. Typically, fusibles are designed to not leave gunk on your needle (they’re a dry glue that melts into fiber), and good ones don’t leave noticeable residue on the fabric either.
Strengths of Fusible Stabilizers:
- Prevents Fabric Shifting or Stretching: Because the stabilizer is bonded to the fabric, the two layers move as one. This is incredibly helpful for stretchy knits – for example, fusing a cut away onto a T.shirt before hooping virtually eliminates the chance of the knit distorting. It also ensures even support: there will be no area that can sag or bubble away from the stabilizer while stitching. Slippery materials (like high.gloss polyester satin or rayon challis) that might slide around are held firmly in place by fusible stabilizer, improving the accuracy of the embroidery.
- No Need for Spray Adhesives or Basting: Fusible stabilizer achieves a similar goal to an adhesive spray or a basting stitch but in a very neat way. There’s no overspray, no sticky hoop, and no extra stitching needed. This simplifies hooping – you can press the stabilizer on, and you’re ready to hoop without wrestling to keep layers aligned. It’s particularly useful for multi.hoop projects or continuous embroidery where you reposition fabric multiple times; the stabilizer stays put between hoopings.
- Avoids Hoop Marks: Much like the sticky stabilizer benefit, fusing stabilizer to delicate fabrics allows you to hoop them without as much risk of distortion. In fact, some embroiderers will fuse a piece larger than the hoop, then float the fabric/stabilizer sandwich in the hoop by only hooping the stabilizer edges (or using a magnetic hoop). Even if hooped normally, the stabilizer gives a bit of a buffer that can reduce hoop ring imprints on certain fabrics.
- Extra Support for High.Stitch Designs: When a design is extremely stitch.dense, a single layer of stabilizer might begin to perforate or shift under stress. Fusing that stabilizer to the fabric distributes the force – the stitches are essentially going through a stabilized fabric that can’t shift or ripple as easily. This can improve registration for heavy embroidery. It also helps prevent puckers at the edges of the design because the fabric was kept flat the whole time.
- Double as Interfacing: In some cases, fusible stabilizers (especially fusible cut aways) serve a dual purpose as an interfacing, adding body to the fabric. For example, a fusible cut away on a lightweight knit not only stabilizes the embroidery area but also can act as a light interfacing making that area a bit more substantial. Some heavy fusible stabilizers (like fusible foam or stiff stabilizer used in purses) are explicitly used to both stabilize embroidery and permanently add structure to the finished piece.
Limitations of Fusible Stabilizers:
- Requires Heat and Careful Application: Using a fusible means you need an iron and the ability to apply heat to the fabric. Heat.sensitive fabrics (certain synthetics, sequined or plastic.coated materials, etc.) might melt, scorch, or lose shape if ironed. You must test on a scrap if possible. Additionally, the process of fusing takes a little time – you have to iron each piece before you can start embroidering. If you have many items to produce, this adds a step for each one.
- Possible Residue or Damage: While good fusibles peel off or wash out cleanly where there’s no stitching, sometimes a bit of adhesive might remain on the fabric after you remove a tear awayfusible. This usually isn’t visible, but it could slightly stiffen the area. With cut away fusibles, the adhesive stays on the portion under the stitches (which is fine). Also, if you fuse too hot or too long, the adhesive can penetrate through very thin fabric and cause a slight glue stain or shiny spot on the front. Using the right temperature and a pressing cloth can mitigate this.
- No Repositioning Once Fused: Adhesive stabilizers (sticky) at least allow a bit of repositioning or adjustment until you press the fabric down. A fusible, once you’ve ironed it on, is stuck rather firmly. If you accidentally fuse it skewed or with wrinkles, you have to peel it off (which can be difficult or messy) and start over with a fresh piece. Some fusibles are made to be removed with another burst of heat, but it’s not always easy. Essentially, you get one good chance to fuse it smoothly in the right spot.
- Added Stiffness: With fusible stabilizer, you’re adding an adhesive layer between stabilizer and fabric, which can increase stiffness slightly more than the stabilizer alone. Usually this is minor and often helpful (as mentioned, it’s like interfacing). But on very lightweight fabrics, fusing can change the fabric’s hand a bit. For instance, a fusible cut away on a gauzy fabric will make that area feel a bit firmer than the rest of the fabric – necessary for embroidery, but a difference to note. Non.fusible might feel slightly softer during embroidery (though you’d likely have to spray.baste it to hold it anyway, which also stiffens).
When to Use Fusible Stabilizers: Fusible versions can be used whenever you want to ensure zero movement between fabric and stabilizer. Some prime examples:
- Knit garments (Tshirts, onesies, sweaters): A fusible poly mesh cut away is a popular choice for embroidery on soft knits like Tshirts or baby clothes. You iron it on, then embroider. It prevents the stretching and it’s soft and permanent. Afterward, the stabilizer stays but the adhesive is inert. This helps get really smooth, pucker.free results on tricky knits.
- Slippery or lightweight fabrics: If you have a delicate cotton voile or silk charmeuse that you want to embroider, fusing a very lightweight stabilizer to it will make it behave like a more stable fabric. You’ll avoid distortions that could happen if it shifted in the hoop or under the needle.
- Accurate placement for multiples: If you’re doing, say, a set of napkins or quilt blocks that all need the embroidery in the exact same spot, you can fuse stabilizer to each piece in the same position using a template. This way, each piece will hoop up identically with no shifting of fabric on stabilizer. It’s a way to improve consistency.
- Avoiding hooping damage: For materials like vinyl, leather, faux leather, a fusible tear awaycan be helpful. While you might not iron leather (heat could damage it), a gentle fusible or even a sticky might be better. But something like vinyl or cork fabric that can take a bit of heat, you can fuse a tear awayto it, then clamp just the stabilizer in the hoop. After stitching, tear away the stabilizer and it will have left no needle holes from hooping in the vinyl outside the design area.
- Multi.layer stabilization: Sometimes embroiderers fuse one layer of stabilizer to the fabric and float another layer (not fused) underneath during stitching for extra support. The fused layer ensures the fabric doesn’t move, and the second layer adds strength for heavy stitching but can be removed if it’s Tear Away, leaving only the fused one in place.
In general, if you often embroider stretchy garments, investing in a fusible knit cut away stabilizer can save you a lot of headaches with puckers. If you are quilting or in.the.hoop piecing, fusible tear awaycan temporarily stiffen fabric pieces for easier stitching and then be removed.
To use fusibles well, always follow the manufacturer’s instructions for iron temperature and fusing time. Use a pressing cloth to keep your iron clean and protect the fabric. Press the iron (don’t slide it around too much) to avoid shifting layers while the glue is melting. Let it cool for a moment – the bond usually strengthens as it cools. After embroidery, most fusible Tear Aways can be peeled off (some rubbing with fingers can help loosen the glue’s hold on fabric if needed).
One more note: fusible protective backing (like Sulky Tender Touch or Cloud Cover) is a specialty fusible used after embroidery: you iron it on the back of finished embroidery to cover the stitches and cut away backing so they don’t irritate skin. That’s not used during stitching, but it’s good to know for improving the comfort of embroidered clothing. It’s a different product from stabilizers used in.hoop, but worth mentioning to advanced users who make a lot of wearable embroidery.
Specialty Stabilizers and Options
Beyond the basic categories above, there are specialty backing materials designed for particular needs. These often are variations or combinations of the main types, but tailored to solve specific problems. Here are some notable specialty options:
- No.Show Mesh (Sheer Cut away): This is a lightweight cut away stabilizer made of a soft, sheer mesh (often nylon or polyester). Its claim to fame is that it’s translucent and very thin, so it doesn’t show through light.colored or thin fabrics, and it adds minimal bulk. It provides permanent support like a regular cut away, but once the excess is trimmed, the remaining stabilizer is practically invisible behind the embroidery. Best use: light knit shirts, thin blouses, or any garment where a regular cut away might create a visible “badge” shadow through the fabric. For example, on a white t.shirt, a heavy cut away would be obvious as a white patch; a no.show mesh in skin tone or white will blend in much better. It’s also softer to wear. Keep in mind, no.show mesh is usually intended for moderate stitch counts – if you have a very dense design, you might use two layers of mesh (often at perpendicular angles for strength), or one layer of mesh plus a layer of tear awaythat you remove. Many commercial embroiderers use no.show mesh on polos and sportswear, often pairing it with a temporary stabilizer for extra support during stitching and then having only the mesh remain.
- Poly Mesh & Soft Mesh: These terms often refer to no.show mesh stabilizers (poly mesh is just a brand/marketing term for a particular no.show cut away made of polyester). They emphasize being soft to the touch and strong for their weight. This kind of stabilizer is a staple for professional embroidery on performance wear and lightweight garments.
- Black Stabilizers: Most stabilizers come in white, but for dark garments you can often get black versions, especially in cut away and no.show mesh. Using a black cut away on a black or dark navy shirt, for instance, ensures that if any stabilizer shows or if the fabric is slightly translucent, you won’t see a white patch behind the embroidery. It’s a simple option to improve the look on dark items. Black stabilizer has the same properties (tear, cut, etc.) just dyed black.
- Water.Activated Adhesive Stabilizer: This is a specialty adhesive stabilizer where the sticky side is dry to the touch until you moisten it with a little water. At that point it becomes tacky, and you can stick your fabric down. It’s useful if you want an adhesive stabilizer but would rather avoid any spray or long.term stickiness. Typically, these are Wash Away or tear awaystabilizers. The nice thing is the adhesive often washes out with water (for Wash Away types) or stays on the stabilizer that’s removed. They’re good for those who found regular sticky stabilizers too messy – you activate only as much area as needed with a damp sponge. This falls under the adhesive stabilizer category, but it’s a special subset worth noting for advanced users exploring alternatives.
- Flame.Retardant Stabilizer: When embroidering children’s sleepwear or items that by law need to retain flame resistance, you shouldn’t use a stabilizer that nullifies that. Specialty flame.retardant backings exist (usually a type of cut away or tear awaymade of flame.resistant fibers). They ensure that after embroidery, the garment still meets safety standards. These are not commonly needed unless you specifically are making items under those regulations, but they are available.
- Tear Away/Wash Away Combination: Some stabilizers combine features, like a tear awaythat partially dissolves. For instance, a stabilizer might tear away mostly, but any small bits left will wash out in the laundry. These can be convenient for items like quilts or clothing where you tear away the bulk, but don’t have to pick out tiny bits – the wash will clean them up. These are often mid.weight Tear Aways with a wash.out component.
- Cap Stabilizer: Embroidering caps (especially structured caps) is a specialty in itself. The stabilizers used for caps are typically heavy, stiff tear awaysheets, sometimes starch.infused. They need to handle high.speed stitching on a curved, structured surface. They tear cleanly because you can’t have big pieces left inside a cap. If you do a lot of hat embroidery, you might use these specific stabilizer sheets that fit the cap frame and tear away with a crisp edge. Essentially it’s not a different material than Tear Away, just heavier and pre.cut for convenience.
- 3D Foam for Puffy Embroidery: While not a “backing” under the fabric, it’s a stabilizer.like material used on top to create raised embroidery (like 3D puff lettering on caps). This is a foam sheet usually 2–3 mm thick. You place it over the area to be embroidered (often taping it in place), then the machine stitches a satin border that perforates and tacks down the edges of the foam. Afterward, the excess foam is torn away, leaving the parts under the stitching which give a rounded, elevated look. For an advanced embroiderer, foam is a fun specialty material to experiment with for dimensional effects. Keep in mind you still use normal backing underneath the fabric when doing 3D foam embroidery – the foam is just an added layer on top. Foam comes in various colors to match your thread, so any bits that remain aren’t visible.
- Specialty Interfacings as Stabilizers: In some cases, products marketed as interfacings for sewing can double as embroidery stabilizers for specific purposes. For example, a fusible woven interfacing can be used to stabilize fabric before embroidery when you want to maintain the fabric’s softness (this is often done in tailoring with embroidered fabric). Or a foam interfacing (like Pellon foam) can be used behind embroidery in bags to give both stabilization and padding. These are situational uses but worth mentioning to intermediate users who might experiment beyond standard stabilizers.
- Dissolvable Canvas/Paper: A unique stabilizer for certain embroidery styles is water soluble canvas or paper. This is often used for cross.stitch.like machine embroidery on top of a fabric: you can hoop a water soluble canvas grid, embroider a cross.stitch design, then wash it away leaving a faux hand.stitched look on the base fabric. There are also printable dissolvable papers to print an embroidery template, stitch through, then wash out. These aren’t standard backings but interesting tools for special techniques.
- Basting and Topping Films: We mentioned water soluble topping (which is a specialty stabilizer placed on top). There are also Heat away topping films used on fabrics that can’t get wet (a clear film that you iron to remove – works similarly to Heat away stabilizer but used on top for nap control). And some people use thin plastic sheets or even tissue paper as a makeshift stabilizer for small areas or toppings for stabilization of specific stitches (like buttonholes). These are creative adaptations rather than official stabilizer types, but it shows that stabilizer materials can be employed in many ways to solve embroidery challenges.
In essence, specialty stabilizers are about fine.tuning the embroidery support to the project’s requirements. As you grow in embroidery experience, you’ll discover specific needs — maybe you want a stabilizer that’s extra soft, or one that’s ultra firm for a certain applique, or something that completely vanishes for a heirloom handkerchief. Chances are there’s a product out there that fits the bill, or you can combine products (like fusing two different stabilizers together, or using toppings plus backings) to achieve the result.
Matching Stabilizer to Fabric and Design: Practical Tips
Bringing it all together, how do you decide which stabilizer to use for a given project? Here are some practical guidelines for matching backing material to fabric type, stitch density, and end use:
- Stable Wovens (e.g. quilt cotton, denim, canvas): These fabrics have little stretch and hold stitches well. Tear awaystabilizer is often sufficient, especially for moderately dense designs. Use a medium or heavy tear away for high stitch counts or if the design has lots of detail. For light stitching (like redwork or run stitches), a light tear away or even a Wash Away (if you want no backing at all) could work. If the item will be laundered often (like a denim jacket), you might consider a lightweight cut away to ensure long term stability, or at least note that you may need multiple layers of Tear Away. Because these fabrics are strong, you typically don’t need the permanent support of cut away unless the design is very complex or the fabric has a loose weave.
- Knit Fabrics (Tshirts, polos, sweatshirts, stretch jersey): Always use cut away on knits. The stretch of knit demands a stabilizer that stays to prevent the design from stretching out and puckering after the stabilizer is gone. Choose a weight based on the fabric heft and design density: a lightweight or mesh cut away for a thin t.shirt with a small design, up to a medium or even heavy cut away (or two layers) for a thick sweatshirt with a dense design. If the knit is very light and you worry about the cut away showing, use a no show mesh cut away. You can augment support by using a temporary second stabilizer: for example, stick a piece of tear away on the back of the hooped cut away for stitching, then tear it off afterward. This gives extra stability during embroidery without adding extra permanent bulk. Also consider using a fusible cut away on knits – fusing prevents the knit from shifting while hooping and stitching. For logos or text on polos, commercial shops often use one layer of fusible mesh cut away (permanent) and one layer of tear away(temporary).
- Sheer or Lightweight Fabric (voile, organza, chiffon): These fabrics are tricky because they can’t support a lot of stitches and any stabilizer might show through. Wash Away stabilizer is great here if the design is open enough and the fabric is washable. A fine lace monogram on organza could be done with Wash Away so nothing remains except the stitching. If the fabric is too delicate to wash or the design is not freestanding, you might use a sheer mesh cut away and try to match the color to the fabric (e.g. use nude or gray mesh on sheer material) – it will be slightly visible but less so than white. You will want a very lightweight stabilizer regardless, perhaps even just a Wash Away that you mostly tear off by hand, leaving tiny bits to wash out later. Also, using topping on sheer can help stitches sit nicely if the top surface is textured or open weave. Be mindful to reduce stitch density in designs for these fabrics, and use sharp needles to make the smallest holes possible.
- Delicate Specialty Fabrics (silk, satin, velvet, leather): High .end or tricky materials each have considerations:
- Silk or satin: These can show hoop marks easily and may be damaged by water. A sticky or fusible tear away is often good: it holds the silk without needing to hoop tightly, and tears away after. If the silk is washable, a Wash Away could be used to avoid any remaining backing; if not, a very soft cut away might be better and just accept a permanent backing for stability. Always use the lightest effective stabilizer on silk so as not to mar its drape. Fine silk may do well with two layers of the finest stabilizer rather than one thicker layer.
- Velvet or corduroy: They have pile and can be crushed by hoops or get embroidery sinking in. Use hoopless methods: sticky stabilizer or fusible Tear Away, and consider a Wash Away topping on top to keep stitches from sinking. Velvet is usually not washed, so a tear awaybase is fine (you wouldn’t want to soak velvet to remove stabilizer). A Heat away could also be used if you test that the velvet tolerates the necessary heat (some do a quick press on the back under a pressing cloth).
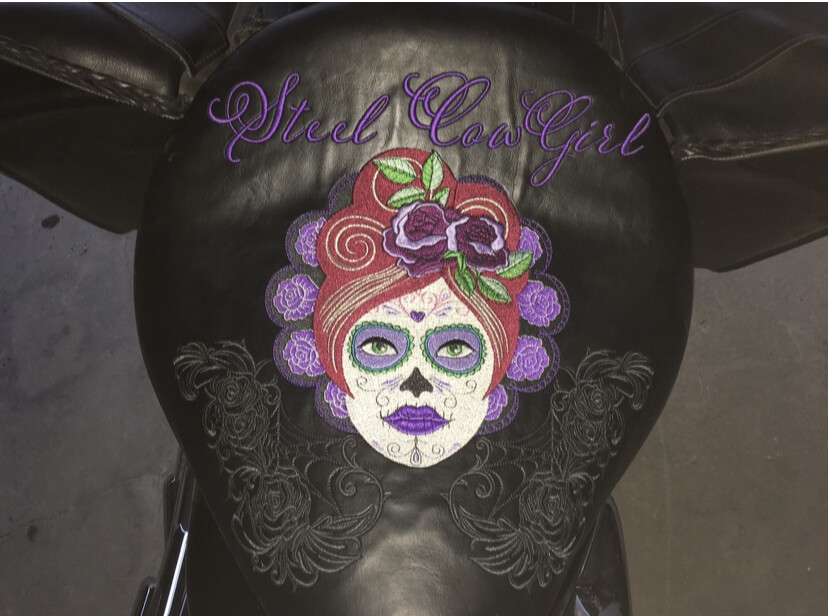
- Leather or vinyl: These don’t fray and are quite stable, but any holes (like needle perforations) are permanent. Tear away stabilizer is the typical choice because you want to remove as much as possible (a cut away would leave a piece of stabilizer that could be seen or might eventually peel under the leather). Use a medium tear away and possibly a topping film on top if the leather is very soft (to help the foot glide). Adhesive stabilizer works well to avoid hooping clamps on leather – stick the leather to a hooped Tear Away. Since leather isn’t washed, you don’t need a permanent stabilizer, but do pick one that tears off easily without straining stitches (sometimes a light cut away that you just trim might be chosen if the design is dense, to avoid having to rip anything out). Also, leather can be pressed only on the wrong side with caution, so fusibles are generally avoided unless absolutely needed.
- Fleece and Terry Cloth: These have stretch (knit base for fleece, some give in terry) and a high pile. Cut away stabilizer is a safe bet for anything wearables (fleece sweatshirt, plush blanket) because of the stretch. You might get away with a tear away on a thick terry cloth towel (since towels are usually cotton and stable enough), but even then many prefer a cut away to keep the embroidery looking good through many washes. In either case, use a water soluble topping on the surface to deal with the texture. For towels specifically, if you dislike having cut away visible on the back, a compromise is to use a medium tear away and know that the towel’s own thickness and the dense towel loops will kind of “hide” the fact that the embroidery might loosen over time. But if longevity is critical, use cut away and just trim it neatly. Fleece is usually a knit that can stretch, so definitely cut away or at least a no show mesh (fleece often doesn’t ravel, but the embroidery can sink, so topping helps too).
- High Density or Large Designs: Regardless of fabric, if your design is heavy (lots of fill stitches, high stitch count), err on the side of more stabilization. This could mean using a heavyweight cut away or multiple layers of stabilizer. A common approach is one layer of cut away and one layer of tear away together: the cut away stays to support long term, the tear away adds extra rigidity during stitching and can be torn off to reduce bulk. Another approach for huge designs is to rehoop or float new stabilizer underneath as the machine moves to new sections (for multineedle machines or very large hoops). Also consider using basting stitches features to further secure fabric to stabilizer for such designs. If the design covers a large area of fabric, hooping becomes trickier, so sticky or fusible might help keep everything stuck evenly to avoid shifting in the middle.
- Designs with Small Lettering or Detail: Fine details require stability to keep outlines sharp. Cut away is preferred to avoid any shift. A trick for small text on something like a woven shirt: use a medium cut away plus a piece of Tear Away; the tear away comes off to not make it too stiff, but the cut away ensures letters don’t pull apart. Also, a topper can sometimes help keep small details from sinking in (like small letters on a pique polo – the topping prevents the letters from getting fuzzy edges).
- Projects Intended to Be Reversible or Seen from Back: If you’re embroidering something like a sheer curtain, a scarf, or a handkerchief, you may not want any stabilizer remnants. Wash Away stabilizer is ideal if the fabric can be washed. If not, perhaps using the finest no show mesh and matching thread to it could minimize its appearance. Another tactic is to incorporate the stabilizer into the design (for example, applique a second layer of fabric on the back to hide the stabilizer, effectively making a sandwich). But those are advanced tricks beyond backing materials themselves.
- Items that Must Remain Soft: Think of a plush baby blanket or a drapey silk dress – you don’t want a rock hard embroidery patch on them. Using softer stabilizers is key: no show mesh cut away instead of regular cut away, or tear away with careful removal if appropriate. And avoid stacking too many layers or using a super heavy stabilizer unless needed. Sometimes two layers of a softer stabilizer are better than one layer of a very stiff stabilizer, as they distribute support but remain flexible. For baby or kid clothes, in addition to the stabilizer during stitching, you might later cover the back with that fusible “cover stitch” tricot for ultimate softness.
- High Volume or Commercial Production Considerations: If you, as a home based commercial embroiderer, are doing larger runs, efficiency matters. Pre cut stabilizer sheets can save time (no trimming off a roll each time). Using the right width roll for your hoop prevents waste. You might choose a slightly heavier stabilizer than absolutely necessary just to be safe and avoid mistakes that would waste a garment. Commercial shops often use cut aways for most garments and only switch to Tear Aways for specific items (caps, towels, etc.), because they favor consistency and quality over the minimal cost difference. As a small producer, adopting those best practices (like always cut away on apparel) can reduce customer complaints. That said, also consider the finishing: you may trim cut away closer if the customer cares about appearance, or use black stabilizer on black shirts, etc., to give a polished look.
Finally, test whenever possible. If you have a scrap of your project fabric, do a quick embroidery sample with the stabilizer you intend to use. Tug and wash that sample if the item will be laundered. See if it puckers or if the stabilizer shows too much. This will give you confidence in your choice or tell you if you need to adjust (e.g., add another layer, switch stabilizer type, etc.).
Qualities of Good Stabilizer and Final Thoughts
Not all stabilizers are created equal. When shopping or choosing stabilizers, here are a few things to look for in terms of quality:
- Consistent Weight and Texture: A good stabilizer will be uniform throughout, without thin spots or lumpy areas. Inconsistent stabilizer can lead to uneven support and embroidery issues. Branded stabilizers from reputable companies often have reliable quality control.
- Low Stretch (when Meant to Stabilize): With the exception of specialty stretch interfacing, most stabilizers should not stretch easily. Give it a little tug – a quality cut away or tear away should be stable. If a cut away stretches like fabric, it may allow distortion. (No show mesh has a slight give in one direction by design, but still it’s very stable along the other grain.)
- Easy Removal (for Tear/Wash Types): A tear away should tear neatly without shredding excessively or pulling fibers of the fabric. If you find you’re fighting to rip it or it’s coming off in tiny bits, consider a different brand or weight. For Wash Away, quality ones dissolve cleanly and quickly in water without needing aggressive scrubbing. Cheaper Wash Aways might leave a filmy feeling if not fully dissolved.
- Doesn’t Gum Needles: Adhesive stabilizers and fusibles from good brands claim to be needle friendly. While some slight residue is normal over many stitches, you shouldn’t get significant gumming within a few thousand stitches. If you do, the adhesive formula might be poor. Also, the stabilizer shouldn’t have excess chemical finish that causes thread breaks or machine deposits.
- Stable to Ironing and Washing: A cut away or tear away of quality won’t shrink or distort drastically with ironing or washing. (For instance, if you iron a damp embroidered piece, the stabilizer shouldn’t wrinkle up or shrink smaller than the embroidery causing puckers.) Some very cheap stabilizers, especially old fashioned starch heavy ones, could shrink when wet or heated. Modern polyester stabilizers usually avoid that.
- Softness (when Needed): For wearable items, you want a stabilizer that after embroidery feels soft against the skin. Many cut aways are now made to be soft touch, meaning they won’t feel scratchy. If you find your stabilizer feels like paper or is irritating, look for one labeled as soft, or consider adding the fusible cover mentioned. A quality tear away for quilting or crafts can be firmer since it’s removed, but a quality cut away for garments should feel smooth and not irritate.
- Appropriate Weight Options: Good stabilizer lines offer multiple weights, allowing you to pick what’s best. If you only find one generic weight of stabilizer, it may not suit all projects. It’s worth having light, medium, and heavy options available (especially for cut away and Tear Away).
- Documentation and Recommendations: High quality stabilizer products often come with guides or charts suggesting use cases. If you see a stabilizer that provides information (like “Use this for knit fabrics, 1.5 oz”), that’s a sign the manufacturer understands the embroidery applications. This can help you learn and choose correctly. In contrast, generic stabilizer with no info might require more guesswork.
- Price vs. Performance: While you don’t always need the most expensive stabilizer, extremely cheap bulk stabilizer might use inferior fibers or inconsistent manufacturing. Middle to high end stabilizers may save you frustration in the long run. Since stabilizer is literally the foundation of your embroidery, it’s wise to invest in decent quality. But also use it smartly – e.g., using more of a cheap stabilizer in layers can sometimes substitute for one piece of a pricey stabilizer; just be sure the outcome is equivalent.
In conclusion, mastering the use of different embroidery backing materials is a big step toward producing professional quality machine embroidery. By understanding the characteristics, strengths, and limitations of each stabilizer type, you can make informed choices for every project. Remember: fabric, stabilizer, needle, thread, and design all work together. When you match the stabilizer to the fabric’s needs and the design’s demands, you set yourself up for smooth embroidery and a beautiful finished result.
Experimentation and experience will further hone your choices – don’t be afraid to try a new type of stabilizer on a challenging fabric, or to combine stabilizers for tricky projects. With time, you’ll develop a feel for exactly what each situation calls for. Stabilizer may not be the most glamorous part of embroidery, but it is absolutely crucial. A well chosen backing is the secret behind flat, professional embroidery that stands the test of time. Happy stitching and stabilizing!
