Comprehensive Guide to Embroidery Thread Color Matching
Introduction
Embroidery is often described as “painting with thread,” and mastering color is key to elevating your work to an art form. For experienced embroiderers – whether working by hand or with a machine – choosing the right thread colors is a sophisticated skill that combines artistry with science. This guide dives deep into embroidery thread color matching, equipping intermediate to advanced stitchers with knowledge to make confident color decisions for any project. We’ll explore advanced color theory (hue, saturation, value, and classic schemes like complementary and analogous), the science of visual perception and color interaction, and practical factors like thread texture and lighting. We’ll also cover concrete tools and techniques: using thread color cards, leveraging digital color matching apps, calibrating your devices for color accuracy, considering fabric interaction, and previewing designs. With strategic planning and informed artistic decision.making, you can ensure your thread colors harmonize beautifully and achieve the intended impact.
Color Theory Fundamentals for Embroidery
A solid grasp of color theory lays the groundwork for effective color matching in embroidery. In color theory, hue, saturation, and value are the three fundamental attributes that define any color:
- Hue is the basic color family or wavelength – red, green, blue, etc. It’s what we usually mean by the color name.
- Saturation (or chroma) describes the intensity or purity of a hue. Highly saturated colors are vivid and rich, while low saturation colors (tones) appear more gray or muted.
- Value refers to the lightness or darkness of a color, from pale tints to deep shades. Mastering value contrast is vital in embroidery; even if two threads are different hues, if their values are too similar, the design can look flat or “muddy.” Using a range of light, medium, and dark values in your palette creates depth and clarity. Always consider value contrast not just between threads, but also between your threads and the fabric background.
Tints, Shades, and Tones: A tint is a hue mixed with white (raising its value), a shade is a hue mixed with black (lowering value), and a tone is a hue mixed with gray (reducing saturation). In an embroidery context, threads come in many tints and shades of each hue. For example, a single color like blue may be available as a light baby blue (tint), a pure royal blue (full saturation hue), and a dark navy (shade). Combining tints and shades of one hue can produce monochromatic shading effects in embroidery. If you want a realistic three.dimensional look, choose threads of the same hue in varying values for highlights, midtones, and shadows rather than a single flat color.
Classic Color Schemes
Understanding relationships on the color wheel helps in assembling harmonious (or intentionally contrasting) thread combinations:
- Analogous Colors: Hues located next to each other on the color wheel (for instance, yellow, yellow.orange, and orange) naturally harmonize. Analogous thread palettes often mimic the gentle gradations found in nature and can create a soothing, unified look. In embroidery, an analogous scheme might be used for a floral design blending green, turquoise, and blue threads for leaves and sky – the colors flow nicely into one another.
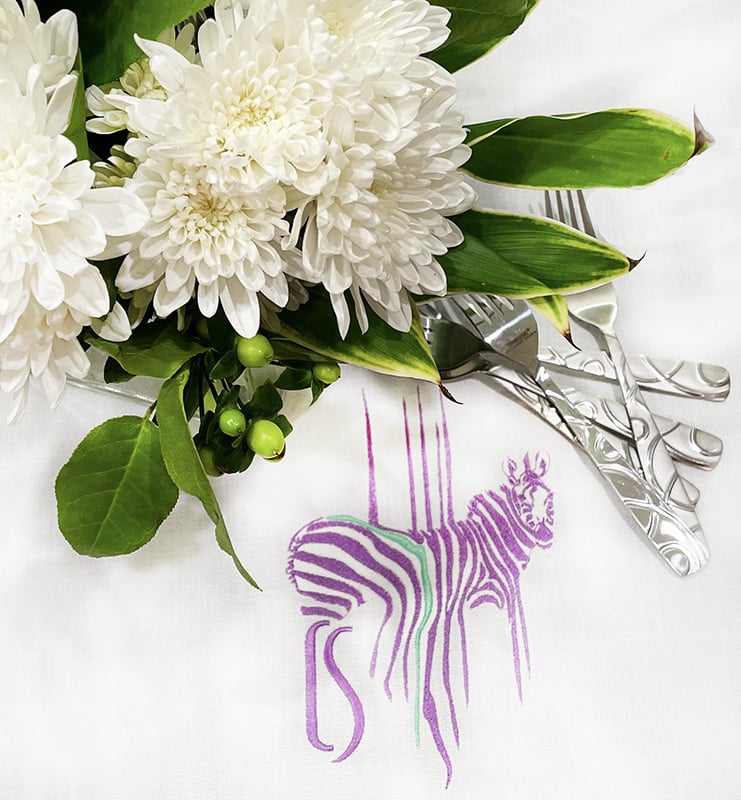
- Complementary Colors: Hues opposite each other on the color wheel (like blue and orange, or red and green) provide maximum contrast and visual pop. Using complementary thread colors can make elements stand out vibrantly. For instance, stitching a gold motif on a purple background creates instant energy. Be mindful that high contrasts can overwhelm if overused; a complementary accent (such as a touch of red against green foliage) can draw the eye without unbalancing the piece.
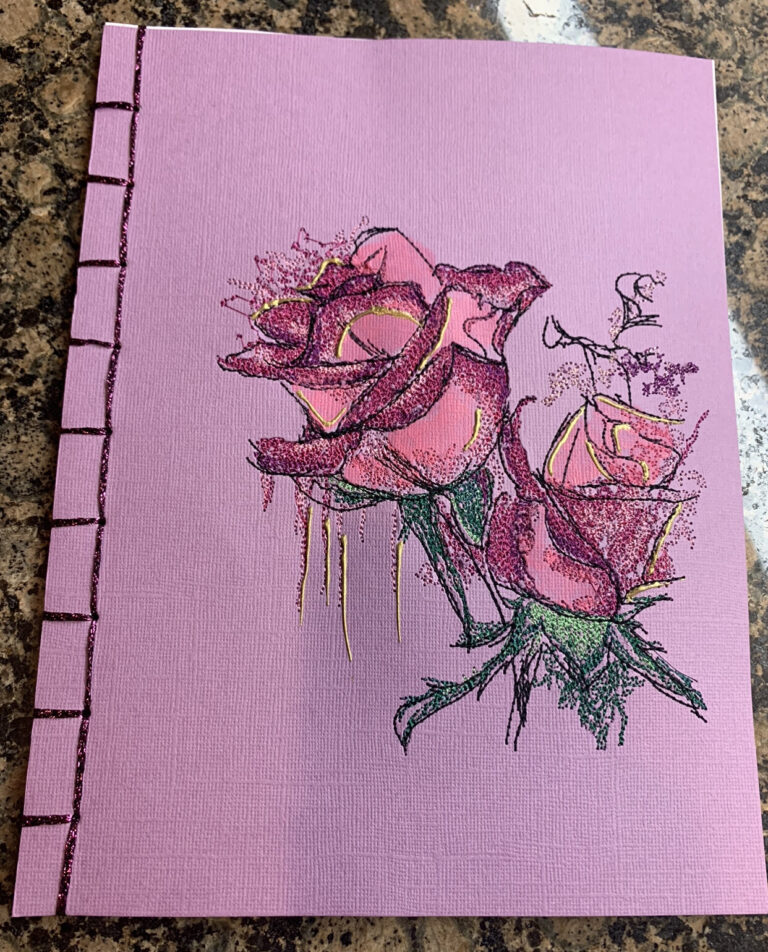
- Monochromatic Schemes: Variations of a single hue in different values and saturations yield a cohesive, elegant result. Monochromatic color schemes are common in tone.on.tone embroidery or delicate shading work. The key is to include enough contrast in value or texture so the details don’t merge together. For example, an all.blue palette can be stunning if you use icy blues for highlights up to dark indigo for depth.
- Triadic Schemes: A triadic palette uses three colors evenly spaced around the color wheel (for example, the classic red.yellow.blue trio). Triadic combinations are vibrant and balanced, offering contrast while retaining harmony. In practice, one or two of the colors might be used as dominant and the others as accents to avoid a clash. If you were embroidering an elaborate motif, you might choose one main color and use the other two triadic colors in smaller areas to create a dynamic but unified design.
- Split.Complementary and Tetradic: For more advanced planning, a split.complementary scheme takes one base color and the two colors adjacent to its complement (for instance, blue with yellow.orange and red.orange) – this offers strong contrast with less tension than direct complements. A tetradic (double complementary) scheme uses two sets of complementary pairs (such as yellow & purple combined with blue & orange). These complex schemes can yield rich results but require careful balance of proportions and values to avoid chaos. An experienced embroiderer might use a tetradic palette sparingly, making sure one color dominates and its complement supports, with the other pair used in subtler ways.
Warm vs. Cool Colors
Colors are also often described by their temperature. Warm colors (reds, oranges, yellows and many pinks) tend to advance visually and feel energetic, passionate or cozy. Cool colors (blues, greens, purples) tend to recede in a composition and evoke calm, serenity or freshness. In embroidery design, warm vs. cool dynamics can be used strategically. For example, in a landscape embroidery, warm golden tones in the foreground can make that area come forward, while cool blue.grays in the background mountains suggest distance. Placing a warm thread next to a cool thread creates a vibrant contrast in temperature as well as hue – the warm element will usually grab attention first. Also consider the relative warmth or coolness within a hue: there are cool.leaning reds (crimson with a bluish cast) and warm.leaning reds (tomato with an orange cast). Advanced color matching means discerning these subtle undertones. When combining threads of the same general color, choosing ones with either all warm or all cool undertones usually yields a more cohesive look. Conversely, deliberately mixing a warm and cool variation of the same hue can create a little tension or sparkle. For instance, some realistic skin tone embroideries blend warm peach with a hint of a cooler pink to achieve a lifelike complexion.
Color Harmony and Contrast
A successful color palette balances harmony and contrast. Too much uniformity can look dull, while too much contrast can appear chaotic. Aim to introduce contrast in at least one of the three properties (hue, saturation, value) while maintaining harmony in others. For example, you might choose analogous hues (harmonious in color family) but ensure one is much lighter value than the other for contrast. Or you could use complementary hues (high contrast in color) but in more muted saturation so they don’t clash harshly. In practice, if two thread colors are very close in hue, make sure they differ in value or intensity so they don’t visually blend together. A classic rule of thumb for clear contrast is to avoid using threads that are too similar in all three aspects. Test: Hold two skeins next to each other and squint – if they appear to merge into one color or if you can hardly distinguish them at a glance, they likely lack sufficient contrast for adjacent use. Adjust by swapping one for a lighter or more saturated shade as needed.
Finally, remember that the base fabric’s color counts as part of your palette. Treat the fabric color as another “hue” in the composition. A design’s color harmony should account for how the threads will look against the fabric background. If your fabric is a strong color, you may be effectively working with a complementary or analogous situation already between thread and ground. This ties directly into fabric interaction, which we’ll cover shortly.
Visual Perception and Color Interaction
Choosing thread colors goes beyond static theory; it involves understanding how colors behave when viewed by the human eye in combination. Our visual perception has quirks that can either enhance or undermine your carefully chosen palette if you’re not aware of them.
Simultaneous Contrast: One fundamental phenomenon is that colors can appear different depending on their context. A thread of a medium gray, for example, will seem darker against a white fabric and lighter against a black fabric. Our eyes exaggerate contrasts between adjacent colors – this is simultaneous contrast at work. In embroidery, this means the same pink thread could look more intense when stitched next to a green area (its complementary color) and more subdued when surrounded by a similar red.orange. Be mindful that a vibrant thread might not “pop” if it’s placed alongside an even more vibrant neighbor. Always evaluate your thread choices together, not in isolation. Laying your candidate threads side by side (or even stitching a small sample of them in the intended arrangement) will reveal how they influence each other’s appearance.
Optical Mixing and Distance: The human eye will blend small spots or stitches of color that are close together. In hand embroidery techniques like silk shading or cross.stitch, you might intentionally mix strands of different colors or interweave stitches of two colors. Viewed from a normal distance, these intermingled threads visually mix into a new, blended color. This is analogous to the pointillism technique in painting. For instance, stitching alternating blue and yellow single.thread cross.stitches across an area can give the impression of a greenish tone overall. Advanced embroiderers leverage this effect to extend their color range – useful if you need a hue that falls between two available thread colors. Keep in mind that the texture and stitch size affect optical blending; finer stitches or single.strand work will blend more readily than chunky stitches.
Color Interaction and Afterimages: Highly saturated colors can create afterimage effects or color cast on their surroundings. If you stare at a bright red motif and then shift your gaze slightly, you might momentarily see a greenish afterimage – the eye’s photoreceptors get fatigued and produce a complementary ghost. While embroiderers don’t usually exploit afterimages deliberately, it’s a reminder of how intense colors can affect perception. More practically, a very strong color used in one part of a design can make neighboring areas appear tinged in its complement. For example, a bright red flower might cause a neutral gray background to seem slightly greenish by contrast. Using a small buffer of neutral stitches or outlining can mitigate unwanted visual effects when working with very intense colors.
Human Color Vision Basics: At a scientific level, our eyes have three types of cone cells sensitive to red, green, and blue wavelengths. The brain combines signals to perceive the full spectrum. Because of this, two different spectra of light can appear as the same color to us (a phenomenon called metamerism). In embroidery, metamerism might be noticed if you perfectly match a thread to a fabric under one light, but under a different lighting the thread no longer matches. Dyes in threads have varying spectral properties, so a thread that matched a background in the store could look off under daylight. To avoid surprises, check critical color matches (like threads intended to blend into fabric or into each other) under multiple lighting conditions. View them in natural daylight, and also under the lighting in which the final piece will be displayed (for example, indoor incandescent or LED lighting).
Color Constancy and Adaptation: Our vision also has a remarkable ability to adapt – we subconsciously adjust our interpretation of colors based on ambient lighting and surrounding hues (this is called color constancy). This means a cream.colored thread might still look cream to you whether you view it in warm lamp light or cool daylight, because your brain compensates. However, the camera or screen might register those as quite different. When doing digital color planning or taking photos of your work, be aware of this discrepancy. Use standardized lighting for reviewing colors whenever possible. For instance, many embroiderers use daylight.balanced bulbs in their stitching area to have a neutral light source that reveals true colors.
In summary, visual perception principles teach us that context is everything for color. Always consider threads in combination: how they contrast, blend, and influence each other and the background. By anticipating optical effects, you can choose colors that will behave as intended in the final composition, ensuring that outlines stay sharp, highlights shine, and subtle details don’t disappear.
Thread Texture and Lighting Effects on Color
Embroidery threads come in a variety of fibers and finishes – cotton, silk, rayon, polyester, wool, metallics, matte or glossy – and these textural qualities significantly affect how color is perceived. Two threads that are dyed the same hue can appear different simply because of how they interact with light.
Thread Material and Finish: Shiny threads (like rayon machine embroidery thread or filament silk) reflect light more directly, often making their color appear more saturated or brighter at certain angles. Matte threads (like a cotton floss or wool yarn) scatter light and give a softer, muted look. For example, a deep red rayon thread under a spotlight will gleam and may even show spectral highlights, whereas the same red in a matte cotton might look deeper and more uniform. When matching colors, keep consistency in thread finish in mind: if you mix matte and glossy threads of the same color in one area, the glossy portions may look lighter or more vivid, potentially breaking the unity. However, contrast in texture can also be used artistically – a touch of a shiny thread within a matte design can create a highlight effect without using a different color.
Light Direction and Stitch Structure: The way stitches are laid can cause color to vary. Long stitches like satin stitches have a “nap” or grain; they will reflect light differently depending on their orientation to the light source. If you rotate a hoop and light hits the embroidery from another side, some satin stitch sections may appear slightly different in color because one angle catches the light. This is why machine embroidery designs often alternate stitch direction in large fill areas – it avoids an obvious shift in sheen looking like a color change. For hand embroiderers, if you’re doing something like long.and.short stitch shading, be aware that all stitches in the same direction will share a sheen. If two adjacent sections in the same color are stitched at different angles, one might look darker or lighter purely due to reflection. Plan your stitch directions to complement your color plan, especially for large monochromatic sections.
Fiber Thickness and Ply: The thickness or ply of thread also matters. A fluffy wool yarn in crewelwork will cover ground differently than a smooth strand of cotton. Thicker, fuzzy threads tend to absorb more light (and can create tiny shadows in the fibers), so colors may read slightly darker or duller compared to the same color in a fine, smooth thread. This means when you pick threads, consider the fiber: a pale pastel wool might need to be a touch lighter in dye than a smooth cotton to appear as bright. Additionally, when blending colors by using multiple strands (such as two different floss colors in one needle), the threads’ twist and fiber type will determine how well they visually mix. A tightly twisted, lustrous silk might not blend as smoothly with a cotton strand because it will catch the light differently, making its color stand out more.
Lighting Conditions: Perhaps one of the most critical external factors for color is lighting. As discussed earlier, colors can shift under different lights, so let’s emphasize practical implications:
- Natural Daylight: Generally the gold standard for evaluating thread colors. North.facing daylight (in the Northern Hemisphere) provides a cool, consistent light that shows true color, while direct sunlight is very bright and can be warm in tone depending on time of day (morning light is cooler, evening light is warmer). If possible, choose and compare thread colors in natural light to see their genuine appearance. Remember that some threads (especially those with optical brighteners or neon colors) might fluoresce in UV.rich sunlight, looking extra vivid.
- Artificial Lighting: Common indoor lighting varies. Incandescent bulbs cast a yellowish warm glow; fluorescent lights often are cooler and slightly green or blue; modern LEDs come in various color temperatures. When you will display your embroidery under a certain lighting (for instance, a piece destined to hang in a warmly lit room), check your colors under a similar lamp. A navy blue thread might look nearly black under a warm dim light, losing the effect you intended, whereas under bright white light it shows as blue. Some embroiderers use daylight.simulation lamps or full.spectrum lights in their work area to minimize surprises. If you notice a thread color looks great in daylight but dull under your sewing lamp, you may need to adjust (either choose a more intense shade or plan for lighting in the final display).
- Gloss and Shadow: Lighting interacts with thread finish to create highlights and shadows on the work. Metallic and reflective threads might glare under strong light, sometimes obscuring details. Conversely, a very matte dark thread might “sink” into a dark fabric under low light, becoming hard to see. Plan accordingly: if your design relies on a subtle dark.on.dark detail, it may only be appreciable in good lighting, or you might add a slight contrast or shine to help it be visible.
In summary, the texture of your thread and the lighting environment are as important as the dye color itself for the final perceived color. Advanced embroiderers test their threads under the same conditions the piece will be viewed and consider how each thread’s material will play with light. The goal is to ensure your chosen colors maintain the desired balance and visibility in real.world conditions, not just in theory.
Tools and Techniques for Color Matching
Modern embroiderers have a range of tools to assist in precise color matching and selection. Combining traditional methods like physical color cards with digital technology and calibration can vastly improve confidence in choosing thread colors.
Using Thread Color Cards and Swatches
Thread manufacturers typically provide color cards or charts for their product lines – these can be printed charts or, preferably, cards wound with actual thread samples. For accurate color matching, real thread swatches are invaluable. Here’s how to use them effectively:
- Real Thread Sample Cards: Many brands (DMC, Anchor, Madeira, Sulky, etc.) offer cards that show each available color using a small length of the actual thread. Under good lighting, compare these swatches to your fabric and any reference image or object you’re matching. Because you’re seeing the true fiber, you can trust what you see. For example, if designing a custom piece, you might hold several swatch cards against the fabric to build a palette, flipping between them to find just the right hue transitions.
- Printed Color Charts: If you have only printed charts (or downloaded PDFs), be cautious – printer and screen colors are not always faithful. Still, these charts are useful for planning approximate colors or referencing color numbers. Use them more as a guide to narrow options, then verify with actual thread whenever possible. If you print a chart yourself, use high.quality settings and consider calibrating your printer (more on calibration shortly) to improve accuracy.
- Floss Toss and Sample Stitches: A practical way embroiderers test a color set is the “floss toss” – literally laying the candidate threads on the fabric to see how they look together. Arrange your chosen skeins or cut strands on the background and step back. This gives a preview of glaring issues, like a color blending into the fabric too much or two colors clashing. For more certainty, stitch a small test patch or a few stitches of each color in proximity on a scrap of the project fabric. This mini sample lets you confirm coverage and interaction (for instance, how a yellow thread actually appears on blue fabric when stitched down, or how two flower petal shades look side by side in thread form).
- Thread Conversion Charts: If your design or pattern provides colors from a different brand than you use, or if you need to match a color from one brand to another, use conversion charts. These are tables that list equivalent or close.match color numbers across brands (e.g., converting a DMC floss number to an Anchor floss or to a Madeira rayon machine thread). Keep in mind that conversions are rarely exact – treat them as starting points and then use swatches to fine.tune the match.
Digital Color Matching Tools
Embracing digital tools can expand your color selection process, especially for complex projects or when drawing from digital art or photographs:
- Color Picker and Palette Software: There are web applications and software (like Adobe Color, Coolors, or StitchPalette generators) that allow you to extract colors from an image or generate harmonious color schemes. For embroiderers, tools like Stitch Palettes (online) let you upload a photo or choose a color theme and then suggest matching embroidery thread colors (often in DMC floss or other standard palettes). These can be great for inspiration – for instance, you could take a photograph of a landscape and get a suggested set of thread colors to recreate it in embroidery.
- Thread Manufacturer Apps: Many thread companies offer digital apps or downloadable libraries for design software. For example, some machine embroidery software allows you to work with specific brand thread charts digitally, so when you fill an area with a color, you’re effectively choosing an actual thread color code. You can often switch the brand palette and the software will convert the colors to the nearest available in that line. This ensures that your digital design uses real thread colors that exist. DMC has a mobile app that can help identify colors and their floss codes from photos. Similarly, there are apps where you input a HEX or RGB value and it returns the closest thread color from various brands.
- Color Matching Devices: At the high end, there are handheld color scanners (like the Nix color sensor or the ColorReader) that you can press to a physical surface (like a piece of fabric or an artwork) and they will detect the color and often suggest thread matches or at least give you a color value that you can cross.reference to thread charts. These devices can be useful if you need to replicate a precise color from a client’s logo or match an existing textile. Always cross.check the suggestions they give with actual thread samples, as the texture difference can affect the perceived match.
- Pantone and Universal Color Systems: In professional contexts, you might have a Pantone or other standardized color reference. Some advanced embroiderers use Pantone.to.thread conversion charts: major thread makers publish lists of which of their threads most closely correspond to Pantone colors. If you have a specific Pantone (or another system like HEX code or CMYK from graphic design), you can find the nearest thread equivalent. This is especially important for machine embroidery of corporate logos, where brand colors must be matched. Note that not every color in the world can be perfectly matched by thread – the thread palette is large but finite. You often settle for the closest available color. Additionally, the appearance of that match might differ in fabric versus the Pantone on paper due to texture and sheen (remember metamerism!). Therefore, when possible, visually verify that the chosen thread looks right under the expected lighting and on the fabric, rather than trusting a number code alone.

Color Calibration for Accuracy
When using digital tools, maintaining calibrated devices ensures the colors you see on screen (or in print) correspond to real life:
- Monitor Calibration: If you design embroidery patterns on a computer (for instance, choosing colors in a digitizing program or editing a photo as a reference), calibrate your monitor. Use a hardware calibrator or at least software calibration to adjust your display’s color balance, gamma, and brightness to standard settings (like sRGB). A poorly calibrated monitor might display a certain thread color swatch too blue or too bright, leading you to pick a wrong match. With a calibrated monitor, the digital thread colors (provided by manufacturers as RGB values) will be closer to their true appearance.
- Printer Calibration: Some embroiderers print out design previews or color templates. If you print an image of how the embroidery will look, you’ll want the printed colors to be accurate for planning. Use your printer’s color management settings or calibration tools to ensure it’s not drastically shifting colors. For example, if you plan a project by printing out a mock.up and the printer prints everything darker, you might choose threads that are too light thinking the design is darker than it is. Calibrate and use high quality print modes for any color reference prints.
- Photographing and Scanning Threads: If you are matching a color from an existing embroidery or fabric by taking a photo or scanning it, try to do so under neutral lighting and with correct white balance. Then use editing tools to ensure the color in the image matches the real item before you pick threads from it. Some advanced users include a gray card or color calibration chart in photos of their work to calibrate the image colors later on.
Calibration is a technical step, but it can save a lot of trial and error, especially when dealing with digital designs and cross.referencing between screen colors and physical threads. The goal is to tighten the feedback loop between what you see virtually and what you get with actual threads.
Fabric Interaction: Thread and Background
The fabric you stitch on is not just a passive background; it actively affects how thread colors look and how the overall piece reads. Taking fabric interaction into account is crucial for effective color matching.
Fabric Color Influence: The color of your base fabric can either enhance or dull your thread colors:
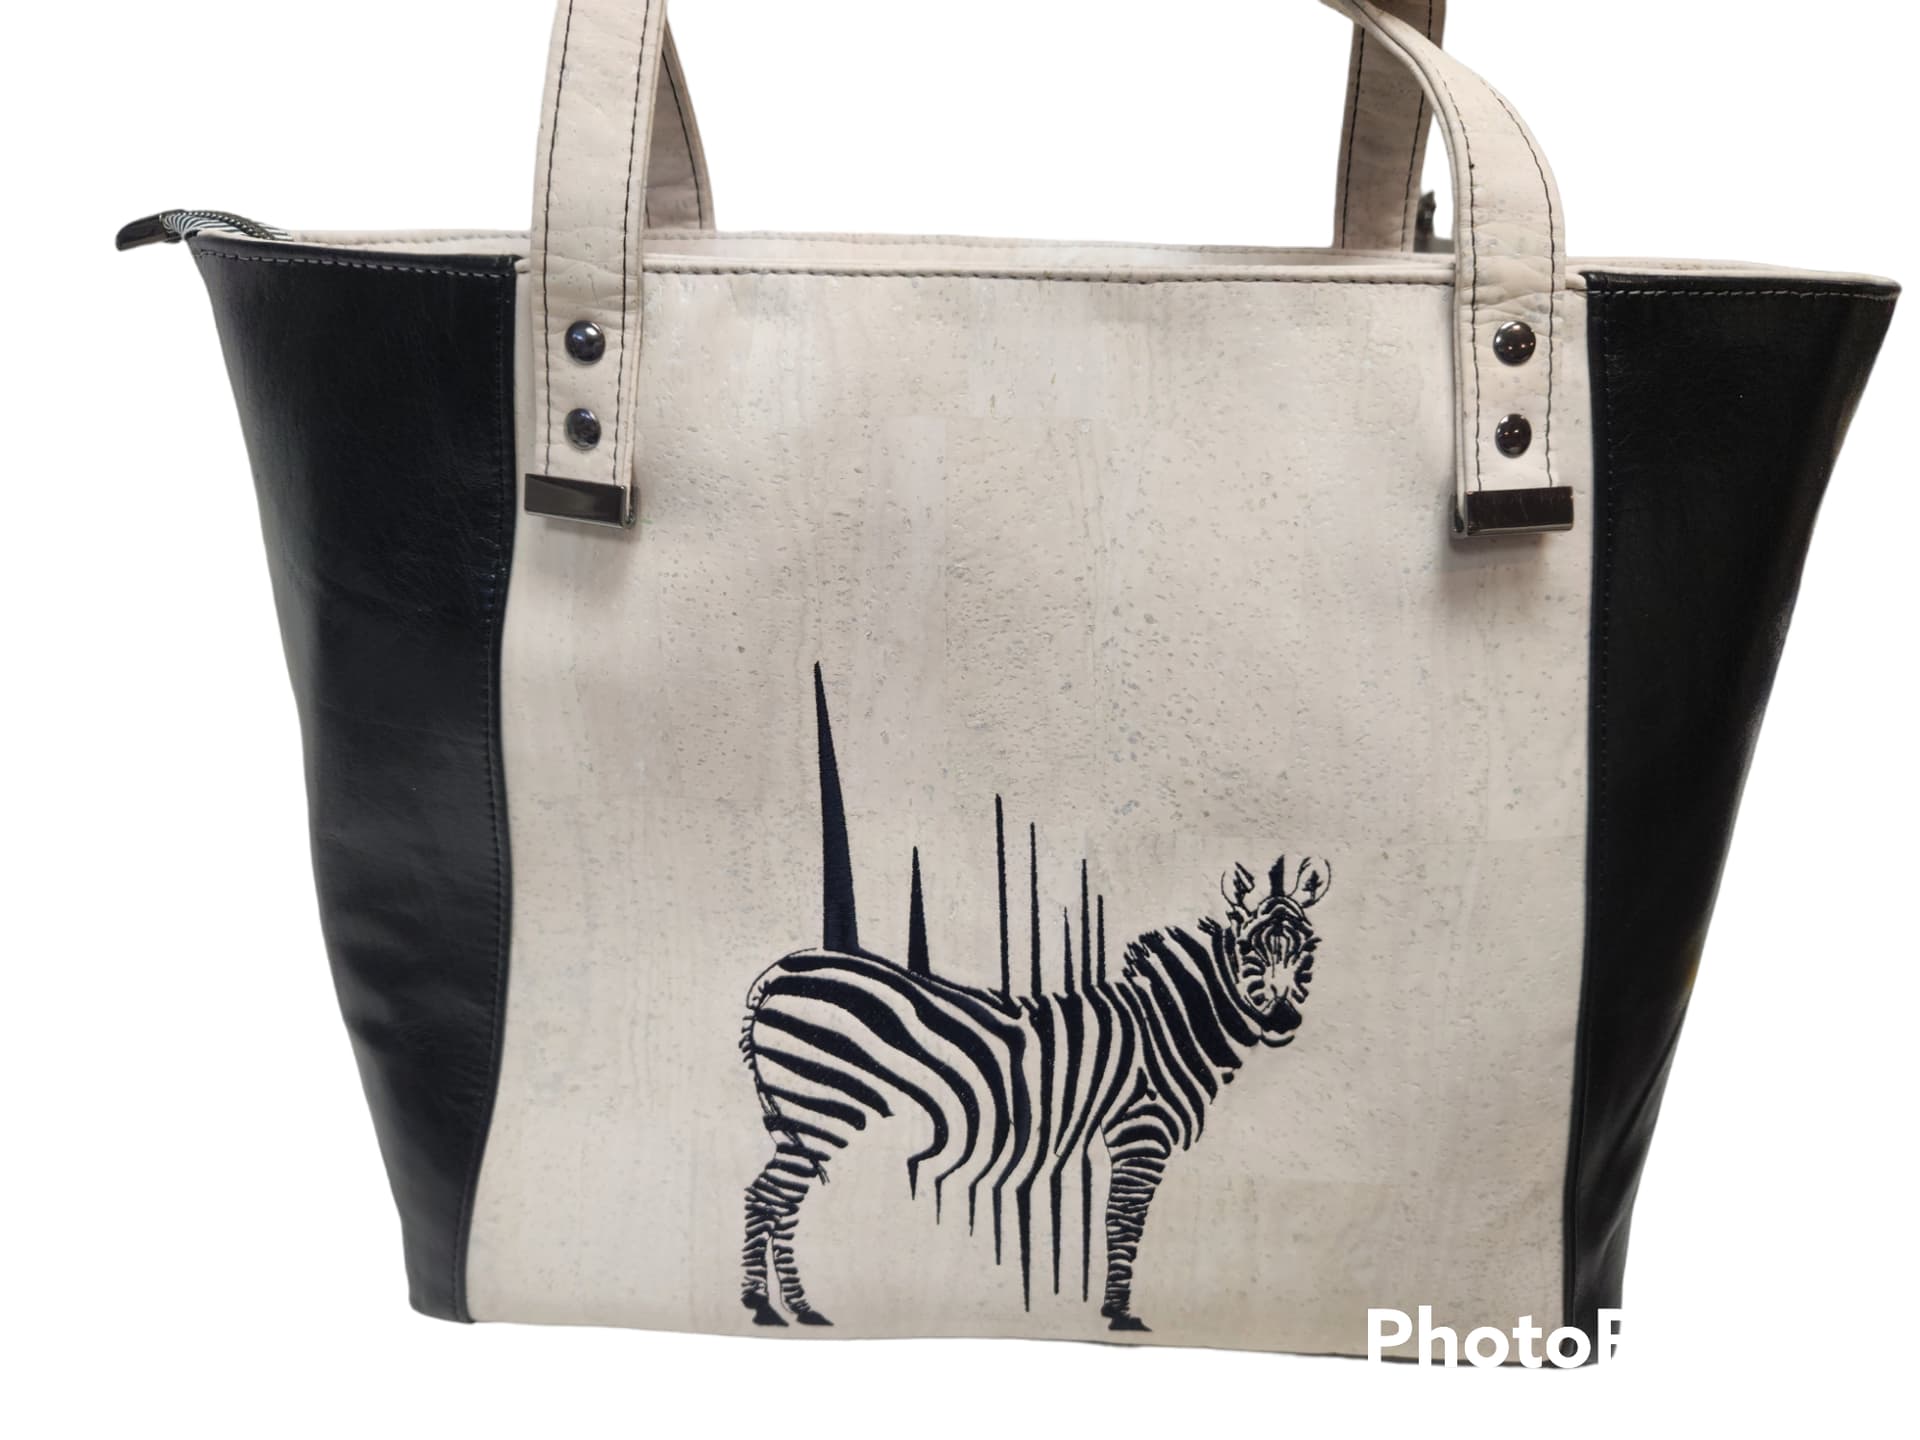
- High contrast between thread and fabric will make the design elements stand out clearly (for example, white thread on black fabric is extreme contrast, very eye.catching). This can be great for readability and bold designs, but be mindful – too high contrast might overpower subtle details or give a very graphic look.
- Low contrast (e.g., light pink thread on a light yellow fabric) can create a blended, soft effect. In delicate, tone.on.tone work this is desirable, but if you want your motif to be visible, you need enough contrast. A rule of thumb: ensure there is enough difference in either hue or value between thread and fabric so your design doesn’t disappear. If a thread is too close to the fabric color, consider outlining the section in a slightly darker or lighter shade for definition.
- When stitching on dark or saturated fabrics, colors may appear less vibrant. A bright red thread on pure white fabric retains its full intensity; the same thread on navy fabric might visually lose some brightness due to contrast effects. Some embroiderers compensate by choosing a slightly more vivid or lighter thread shade than initially planned when working on very dark backgrounds. For instance, a medium blue thread might need to be stepped one value lighter if it’s going on black cloth, so that it doesn’t look too dark once stitched.
Fabric Texture and Sheen: As with thread, fabric can be smooth and shiny (silk, satin) or rough and matte (linen, canvas). A shiny fabric will reflect light around the threads, often making colors appear a bit lighter or more luminous against it. A dull or absorbent fabric might make threads seem a bit more subdued. If you embroider on a textured or printed fabric, the surrounding patterns and colors become part of the visual context:
- On a patterned background, avoid thread colors that exactly match a predominant background color unless your intention is to camouflage part of the design. For example, doing green vines on a green printed background could result in the vines vanishing in places. You might need to adjust to either a darker or lighter green than the print to maintain visibility.
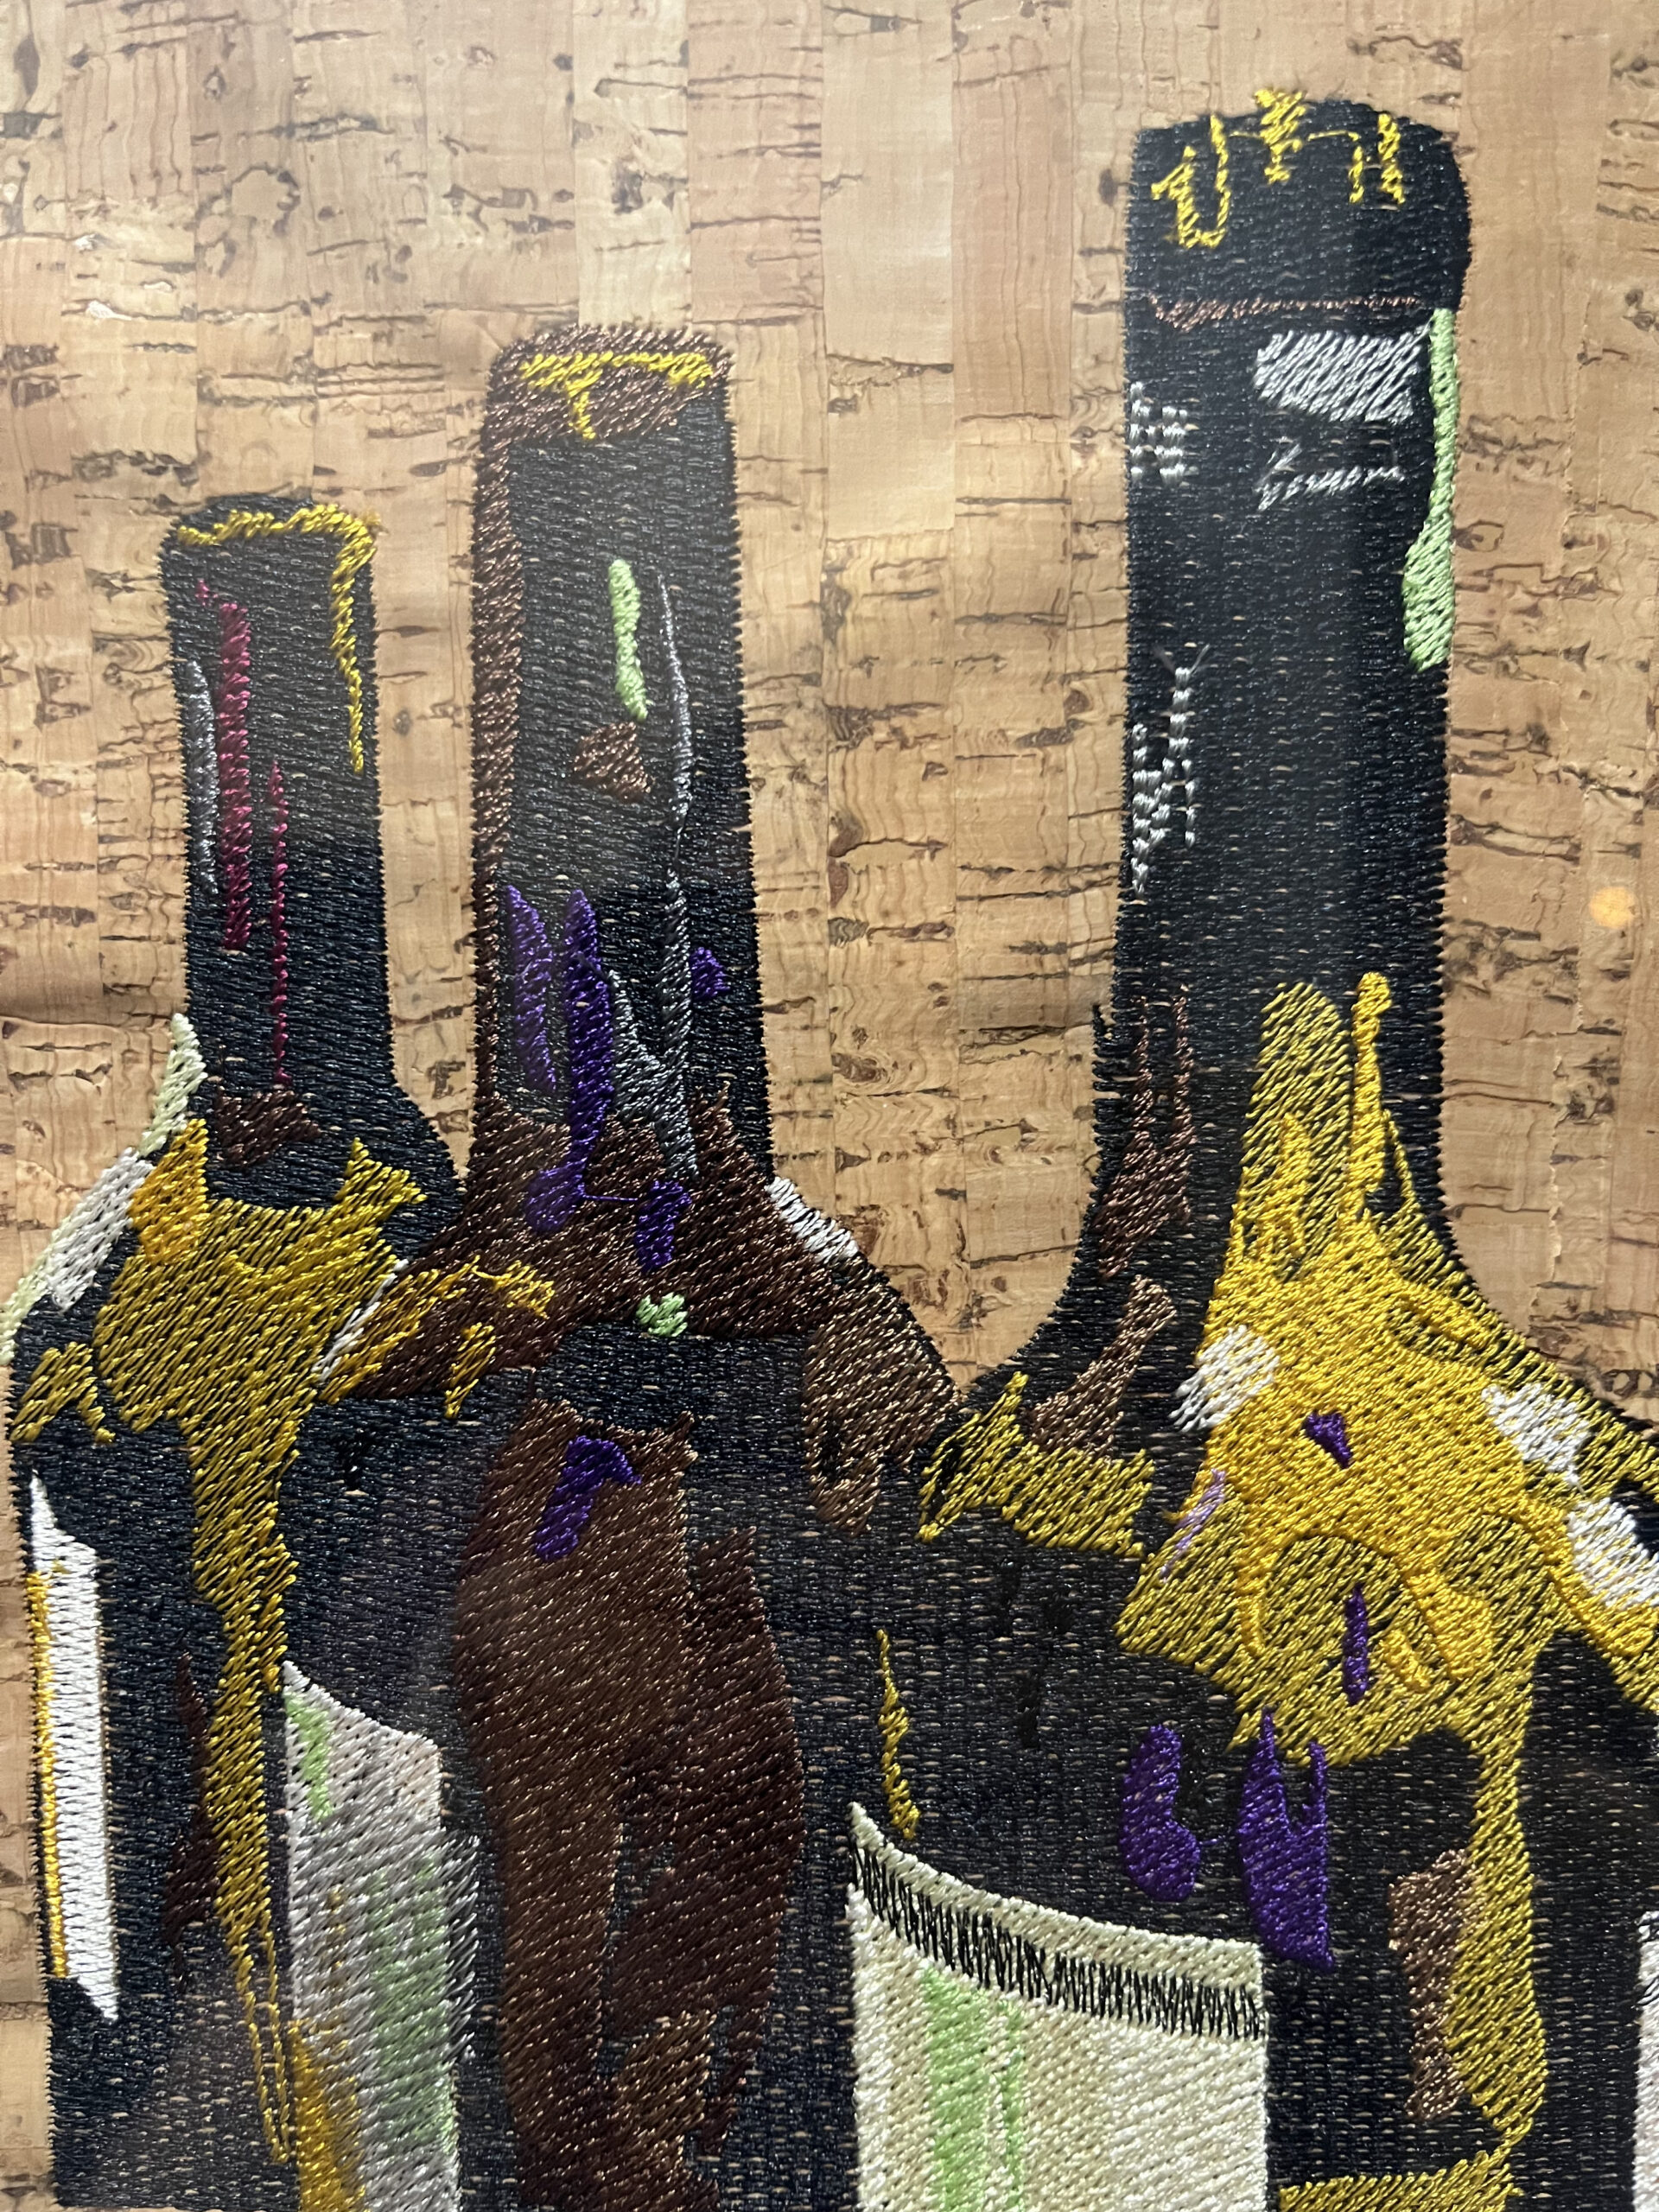
- Heavily textured grounds (like burlap or raw linen) have their own shadows and highlights; fine details in similar color might get lost. Often for such bases, embroiderers choose slightly more saturated or contrasting threads to compensate for the fabric’s “noise.”
Coverage and Fabric Show.Through: Different embroidery techniques cover fabric to varying degrees. In cross.stitch on Aida cloth, there are always small gaps where the fabric shows through around each stitch, so the fabric color will subtly mix with your thread colors in the viewer’s eye. Likewise, in delicate work like Redwork (simple line embroidery), the thin lines of thread are mostly seen in the context of the fabric backdrop. Always envision the combined effect: a light thread on a dark fabric, seen from a few steps away, might look a bit darker overall because the dark fabric peeks around it (a phenomenon similar to optical mixing). If you want a true, bright line on a dark fabric, sometimes using a thicker stitch (more coverage) or an underlay is needed. On the other hand, if you fully cover an area with dense stitching (such as a filled machine embroidery design or heavy satin stitch), the fabric’s color becomes irrelevant for that section – you are essentially creating a new “fabric” of threads. In that case, just make sure the edge of that section transitions well against the surrounding fabric color.
Testing on Fabric: As mentioned earlier, do tests on the actual fabric whenever possible. Stitch a few motifs or even just small blocks of fill with your chosen palette on a fabric scrap. This will reveal surprises like a color not showing up as expected or an interaction you didn’t predict. It’s easier to adjust before you’ve committed hours of work. Sometimes simply changing the order of layers (for instance, stitching one color before another) can affect the edge crispness due to slight overlap – this can also influence perceived color boundaries.
In summary, always think of fabric and thread together as a system. The best thread color choices are made in context: a fabric is essentially another color element in your composition. By understanding how fabric hue, value, and texture influence your threads, you can either coordinate them for harmony or deliberately contrast them for impact, all with predictable results.
Design Preview and Planning Techniques
For complex embroidery projects, especially those you are designing yourself, it pays to preview and plan your color choices before doing the full piece. Experienced embroiderers use a variety of techniques to foresee how their chosen colors will play out and to adjust the plan if needed.
Sketched and Digital Previews: Creating a preliminary visual of the design with color can highlight potential issues early:
- If you’re comfortable with drawing, sketch the design on paper and roughly color it in with pencils or markers matching your thread colors. This doesn’t capture texture but quickly shows if the palette is balanced. For instance, you might realize on a sketch that two large areas of bright color fight with each other, leading you to tweak one to a softer hue before you start stitching.
- Many embroidery or cross.stitch design programs allow you to assign thread colors to the pattern and generate a simulated image of the embroidery. In machine embroidery digitizing software, you can usually set the thread brand and color number for each section, and the software will display the design in those colors (often even simulating the stitch texture). Use this to your advantage: toggle background fabric colors in the software to see the contrast, and print or view the mock.up from a few feet away to mimic real viewing conditions. While screens aren’t perfect, a digital preview is very useful for checking color distribution – for example, ensuring that your accents are well.placed and that no color is over. or under.represented.
- Even general graphic design tools (like Photoshop, Procreate, etc.) can be used: you could import an image of your line drawing and digitally paint the regions with approximate thread colors. Some designers scan the line art of an embroidery pattern and fill it in on the computer to experiment with different color schemes rapidly.
Physical Test Swatches: Nothing beats a real sample. As mentioned, doing a small test embroidery with your palette on the actual fabric is an excellent practice for advanced projects. This could be one element of the design or just a sampler of the various stitches and colors you plan to use. For example, if you are stitching a multicolored botanical scene, you might stitch one leaf and one flower completely on a scrap, to ensure the greens and floral colors work well together and with the fabric. This is especially important for intricate shading work or realistic embroidery, where the interplay of multiple shades is critical.
Iterative Planning: Strategic color planning often involves iteration – adjust and refine as you preview. Start with an inspiration or desired mood: are you aiming for a bold, high.contrast look, or a subtle, analogous palette? Choose a base set of colors accordingly and then ask a series of questions as you preview:
- Do the important elements stand out as intended? If a focal point is not drawing the eye, you may need to intensify its color or increase contrast (for instance, outline it, or choose a complementary color to surround it).
- Is the overall mood right? Sometimes a single color can throw off the harmony – maybe one shade is too warm in an otherwise cool scheme, creating an unintentional focal point. That might be resolved by swapping it for a slightly cooler tone or echoing that warmth elsewhere in smaller touches so it looks deliberate.
- Are there enough value differences? Check that you have a balance of light, mid, and dark tones where needed. If the preview looks a bit flat, consider adding a darker shade for shadows or a lighter highlight color to increase dimension. Conversely, if it looks too harsh, you might soften some contrasts by choosing intermediate tones.
Collaborating with Constraints: In machine embroidery, you may be constrained by a limited number of thread changes or needles. Planning is crucial to make the most impact with fewer colors. A strategy can be to use one thread color in multiple areas of the design for unity and to choose colors that can do double.duty (for example, a single dark brown used for both outline and a tree trunk). Planning these dual roles in advance ensures you don’t accidentally use two very similar browns when one would do, freeing up a slot for another color elsewhere in the design.
Preview in Final Context: If possible, examine your planned colors in the context of where the piece will live. For a piece that will be framed on a wall, consider the mounting or matting – will the colors harmonize or should one be adjusted to suit the environment? If embroidering on a garment or accessory, consider the viewing distance and lighting in use (stage costumes vs. everyday clothes have different needs for color boldness, for example). Sometimes advanced planning even includes viewing the piece under a camera if it’s meant for stage or film, as cameras respond to color differently (this is a niche case, but it underscores that context matters).
By previewing and planning with sketches, digital tools, and test stitching, you can catch and correct color issues proactively. This level of strategic planning is a hallmark of advanced embroidery work and allows for more artistic control. It transforms color selection from guesswork into a deliberate part of the creative process, similar to how a painter might do color studies before committing to a canvas.
Strategic Color Planning and Artistic Decision.Making
With the technical groundwork laid, we turn to the high.level approach: how to strategically plan your color choices and make artistic decisions that result in a stunning embroidery project. This is where theory, perception, and tools all converge into practice.
Start with a Vision or Story: Experienced embroiderers often begin by clarifying what the piece should convey. Are you aiming for a tranquil natural scene or a bold abstract explosion of color? Defining the mood and focus helps narrow your color palette early. For instance, an autumn forest design suggests a warm, analogous scheme of golds, oranges, and reds with perhaps a cool contrast in a small area (like a blue creek) for interest. A modern geometric piece might focus on high contrast complementary colors to create energy. Having this vision guides your decisions – you choose colors not just because they “match” in a generic sense, but because they serve the composition’s intent.
Palette Curation: Rather than grabbing every possible shade, advanced stitchers curate a thoughtful palette. A common strategy is to pick a dominant color (or a few) which will cover the largest or most important areas, then select supporting colors that complement or enhance the dominant ones, and finally accent colors used sparingly for highlights or emphasis. For example, in planning a floral embroidery, you might choose two main colors for the largest flowers, a couple of greens for foliage (supporting, to set the stage but not steal focus), and a small amount of a complementary color (like a few stitches of bright yellow in flower centers as accents). By planning roles for each color, you ensure each contributes purposefully to the overall design.
Leveraging Color Theory Deliberately: Use the color theory principles with intention. If you want an element to stand out, giving it a complementary color relative to the surroundings is effective (a blue bird in an orange tree will be eye.catching). If you want a gentle gradient or unity, analogous colors or a monochromatic scheme will work (shading a dress from lavender to pink to peach stays harmonious because those hues are adjacent or all tints of red). Warm vs. cool can direct the eye – maybe your foreground motif is in warm tones to advance it, while background motifs are cooler to recede. These choices should align with what you find important in the composition.
Balancing Creativity with Consistency: Artistic decision.making in color is sometimes about breaking rules, but doing so knowingly. You might include an “odd” color on purpose as a focal point. A famous example in art is adding a small stroke of unexpected color to make a piece come alive – an embroiderer might include a single bright turquoise bead or thread in an otherwise earthy palette for a spark. The key is to ensure these decisions are deliberate and tested, not accidental. If you introduce a new color family, try to echo it subtly elsewhere to tie the piece together (even a few tiny stitches of that turquoise in a different section can make it feel integrated).
Adapting on the Fly: Even with thorough planning, as you stitch, you may find that certain colors aren’t working as expected. Advanced embroiderers are not afraid to change course – this is part of artistic decision.making. Maybe that green leaf thread looked fine in testing, but en masse it’s too dull next to the vibrant flowers; you might blend in a brighter green or add a light green highlight. The planning process is iterative, and the piece evolves. Keep your color cards or thread collection at hand while working, so you can compare and swap threads if needed. This flexibility ensures the final product benefits from both pre.planning and in.situ artistic judgment.
Documenting Your Choices: As an advanced practitioner, it’s good practice to note your color selections and any changes. Not only does this help if you need to acquire more thread or replicate the piece, it also builds your personal knowledge. Over time, you might create your own reference of favorite color combinations, notes on how certain colors behaved, and so on. This growing expertise feeds back into ever more confident color choices.
Emotion and Personal Aesthetic: Finally, don’t lose sight of the emotional and personal aspect of color. Technical correctness means little if the result doesn’t please the eye or convey the right feeling. Trust your trained instincts – if something looks off to you, even if it “should” work by theory, explore why and adjust. Conversely, if a combination sings to you but is unconventional, that could be what makes your piece unique. Advanced embroiderers often develop a signature palette or style, precisely because of these personal artistic decisions. The theory and tools exist to support your vision, not to replace it. Use them to bolster your confidence that a choice will work, and then execute it with your individual creative flair.
Conclusion
Color matching in embroidery is a rich discipline that blends art, science, and a touch of experimentation. By understanding color theory fundamentals and the nuances of visual perception, you gain insight into why certain combinations succeed or fail. Appreciating the effects of thread texture, sheen, and lighting ensures that the colors you choose will appear as intended in the final piece. Equipping yourself with practical tools – from trusty thread swatch cards and conversion charts to modern apps and calibrated screens – removes much of the guesswork from selecting and translating colors. And by thoughtfully planning and previewing your palette, you can foresee challenges and refine your design before putting in the hours of stitching.
Ultimately, mastery of thread color matching empowers you to plan strategically yet create freely. Every stitcher’s project is an opportunity to make deliberate color choices that enhance the design and express a vision. With the technical knowledge and techniques outlined here, you can approach color with both confidence and creativity. Whether you’re coordinating subtle tonal shifts in an heirloom.quality hand embroidery or juggling dozens of vivid threads in a complex machine embroidery pattern, your informed color decisions will bring your artistic ideas to life in thread. Happy stitching with color!