10 Advanced Machine Embroidery Tips for Experienced Users
Even seasoned machine embroidery enthusiasts can continuously improve their craft. The following ten tips offer in-depth guidance for intermediate to professional embroiderers looking to refine techniques, avoid common pitfalls, and achieve higher-quality results. Each section focuses on a key tip or trick – from technical adjustments to creative methods – to help elevate your machine embroidery projects.

1. Hoop and Stabilize Like a Pro
Proper hooping and stabilization are the foundation of flawless embroidery. At an advanced level, it’s not just about securing fabric, but doing so without distortion or slippage. Always use the right stabilizer for your fabric and design density: for example, use cutaway stabilizer on stretch fabrics to prevent shifting, and use tear-away on stable woven fabrics for easy removal. Choose high-quality stabilizers with an even texture and sufficient weight – flimsy or cheap backings can lead to puckering or misalignment as they may tear or stretch mid-stitch. When in doubt, double up your stabilizer or use a topper: for very dense designs or tricky materials like knits or towels, floating an extra layer of stabilizer or a water-soluble topping on top of the fabric can maintain crisp, clean stitching.
Advanced hooping techniques will help you avoid distortions such as hoop burn or fabric stretching. Hoop on a firm, flat surface and tighten the hoop just enough to hold the fabric drum-taut (it should sound like a drum when tapped) but not so tight that it warps the weave. Avoid pulling or tugging the fabric once it’s in the hoop – this is a common cause of embroidery puckers among less experienced users. If a project is hard to hoop (small or thick items like cuffs or bulky jackets), try “floating” the fabric: hoop only the stabilizer, then secure the garment on top using temporary adhesive spray, sticky stabilizer, clips, or basting stitches. Floating prevents excessive stretching and accommodates items that can’t be hooped normally. Just be sure to baste or pin in key areas to keep the fabric from shifting during embroidery.
Leverage specialized hooping tools for better results. Many advanced embroiderers use magnetic hoops or clamp frames, which hold thick or delicate materials firmly without the screw pressure of a traditional hoop (great for leather, quilts, or multi-layer projects). You can also invest in a hooping station or jig for consistent placement when doing multiple items. Always use a hoop size close to your design size – a hoop that’s much larger than the design leaves too much room for fabric movement. As a final check, run your fingers around the inner hoop edge to ensure the fabric and stabilizer are evenly tensioned with no wrinkles caught under the frame. With perfect hooping and stabilization, you’ll eliminate most causes of puckering and misalignment before you even start stitching.
2. Fine-Tune Thread Selection and Tension for Perfect Stitches
Even high-end embroidery machines require tension fine-tuning when you push the limits with different threads and fabrics. As an experienced user, don’t shy away from adjusting your thread tension to achieve perfect, balanced stitches. First, choose quality embroidery threads appropriate for your project. Polyester embroidery thread is a popular choice for its strength and colorfastness (ideal for items that will be washed often or need durability), while rayon thread has a beautiful sheen and soft finish for decorative pieces that won’t be heavily laundered. Also consider the thread weight: 40 wt is standard for most designs, but for very fine detail or small lettering, a 60 wt thin thread (paired with a smaller needle) can produce cleaner results. Conversely, if you want a bolder look or faster coverage, 30 wt or 20 wt thick threads can be used with suitable designs – just be ready to adjust tension and needle size accordingly. Using the right bobbin thread also matters; a lightweight bobbin thread (60–90 wt) reduces bulk on the underside and helps maintain proper tension balance. Make sure your bobbin is wound evenly and use a bobbin case tension set for embroidery if your machine came with a separate one.
Once your threads are selected, it’s crucial to balance the thread tension. The goal is to have stitches lock in the middle of the fabric layers: neither the top nor bobbin thread should be visibly poking out in excess on the opposite side. As a quick test, examine the backside of a satin stitch column – you should see a thin line of bobbin thread centered, with a bit of the top thread visible on either side of it. If the bobbin thread is overwhelmingly visible on the top of the embroidery, your top tension is too tight (or bobbin tension too loose); if you see loops of top thread on the back or the top thread is laying flat without any bobbin peeking through, your top tension is likely too loose. Adjust the upper tension in small increments and test again until you achieve a balanced lockstitch. Many modern machines have automatic tension settings, but these may need tweaking for specialty threads or thick fabrics – don’t hesitate to switch to manual tension mode when necessary. Keep a notebook of your tension settings for different thread types (metallic, 60 wt, etc.) and fabrics so you can replicate perfect settings in the future.
Remember that thread path and machine threading accuracy also affect tension and stitch quality. Rethread your machine carefully if you encounter sudden tension issues or thread breaks – even experienced users can occasionally miss a guide or have thread partially out of the tension discs. Also, use thread nets or spool caps for slippery threads that tend to unravel, and ensure the thread unwinds smoothly from the spool (vertical vs. horizontal spool orientation can matter, depending on whether the thread is cross-wound or stacked on the spool). By pairing the right thread type with the right tension adjustments, you’ll get clean, even stitches with no thread breaks, looping, or imbalance. Perfect tension is one of those subtle refinements that dramatically improves the professional look of your embroidery.
3. Choose the Correct Needle (and Change It Often)
One advanced yet often overlooked embroidery trick is using the right needle for each project and keeping needles fresh. The needle is the delivery system for every stitch – a suitable, sharp needle prevents many problems like thread breaks, skipped stitches, or fabric damage. For most embroidery with 40 wt thread, a size 75/11 embroidery needle is standard, but be prepared to switch sizes for different needs. For example, delicate fabrics or fine 60 wt thread might perform best with a smaller size 70/10 or even 65/9 needle, which creates smaller punctures and suits detailed stitching. On the other hand, thick materials or heavier threads (30 wt metallic or 3D foam work) call for a larger size 90/14 needle for strength and a bigger eye. Match the needle point to the fabric type as well: use ballpoint needles on knits and stretchy fabrics (the rounded tip parts the fibers without cutting them, reducing runs or holes), and use sharp/regular point needles on woven fabrics, leather, or vinyl to pierce cleanly through the material. There are even specialty needles like wing needles (which create heirloom decorative holes in fabric) or twin needles (for parallel decorative stitching) – these are used in specific creative applications and require appropriate machine settings and designs.
If you’re experiencing thread shredding or frequent breaks, consider using a specialty embroidery needle. For metallic or rayon threads that are prone to fraying, a metallic needle or topstitch needle has an elongated eye and deeper groove to protect the thread as it stitches at high speed. This reduces friction and stress on the thread. Titanium-coated needles are another professional favorite – they last longer and resist heat and wear, which is helpful in commercial or high-volume embroidery situations. Regardless of type, needles should be replaced regularly. A good rule of thumb is to start each new large project with a fresh needle. Embroidery stitches (especially dense designs) can dull a needle faster than regular sewing due to the high stitch count and rapid penetrating action. Even if a needle isn’t visibly broken or bent, microscopic dulling or burrs on the tip can cause stitching issues and damage fabric. If you hear a popping sound with each penetration or notice snags, it’s past time to change the needle.
Finally, pay attention to the needle’s relationship with your machine’s hook timing. While actual timing adjustments are a repair-level task, an advanced user knows that using the recommended needle system (flat versus round shank, correct length) for your machine is vital. In summary, treat needles as a critical aspect of embroidery quality: select the proper size and type, install it correctly (all the way up and oriented properly), and change it out before it causes trouble. This simple habit ensures cleaner stitch formation, less thread breakage, and protects your fabric from unwelcome holes or pulls.
4. Master Precise Design Placement on Your Projects
Precise placement of embroidery designs can be the difference between a project that looks amateur and one that looks expertly done. As an advanced embroiderer, you have several tools and techniques at your disposal to ensure your design lands exactly where you intend on the fabric. Before even powering up the machine, take time to mark and measure. Determine the exact center or key alignment points of your design on the item by using rulers, measuring tapes, or templates. For instance, if you’re embroidering a logo on multiple shirts or a monogram on towels, measure consistently from reference points (like a certain distance from the collar or towel edge) and mark the fabric with a disappearing ink pen or chalk. Utilize the plastic grid template that comes with your embroidery hoop: this grid, when snapped into the hoop, helps you align those center marks under the needle. It ensures the hooped fabric is straight and the design will be oriented properly. Taking the time to hoop with the template and markings aligned will save you from “crooked” embroidery outcomes.
Once hooped, take advantage of your machine’s built-in placement features. Most embroidery machines allow you to verify and adjust the design position before stitching. Common functions include basting boxes and trace outlines – you can stitch a light basting line around where the design will go, or have the machine move the hoop to trace the perimeter of the design. Watching this outline stitch path will show if your design is shifted or rotated incorrectly, giving you a chance to rehoop or adjust before it sews for real. High-end machines offer even more precise tools: features like pinpoint placement, camera positioning, or laser alignment can be game-changers. For example, some machines let you select two points on the fabric (such as where you’ve marked crosshairs) and the machine will rotate and move the design in the hoop to match those points – perfect if your hooping was slightly off or if you need to align with a printed fabric pattern or a previously embroidered part. Other models may project a laser crosshair or use a camera to scan your hooped fabric, showing you exactly where the design will stitch. If your machine has these capabilities, incorporate them into your routine for error-free placement.
Don’t forget traditional aids as well. Printing a template of your design at full size on paper or transparent film can help immensely in positioning. Cut out the paper template and physically place it on your item to preview the look and placement; once satisfied, you can mark the center and perhaps a couple of key points (like the orientation or a horizontal line) directly onto the fabric. Some embroiderers use adhesive target stickers that have a printed crosshair – these can be stuck at the center point and removed after you align the needle to them. This is especially handy if your machine has a camera that can detect such stickers for auto-alignment. Finally, if you need to place multiple designs in relation to each other (such as a pocket design and a sleeve design that should line up, or continuous borders), use a consistent reference and possibly stitch temporary alignment lines that you can later remove. Precise placement is a skill honed with practice: take the extra minutes to measure twice (or thrice!) and utilize both manual and tech tools to get it spot on. Your finished pieces will have that professional symmetry and positioning that set them apart.
5. Use Multi-Hooping Techniques for Large or Continuous Designs
Don’t let the size of your embroidery hoop limit your creativity. Multi-hooping is an advanced technique that allows you to stitch designs far larger than a single hoop by splitting the embroidery into multiple sections. It’s also used for continuous borders or connecting motifs that span more than one hooping. The key to multi-hooping success is careful planning and alignment. Start by working with your embroidery software to split your design logically into sections that will fit your hoop. Many software packages (Wilcom, Hatch, Embrilliance, etc.) have multi-hooping features that let you define hoop areas and will automatically split the design and add registration marks. If you don’t have software to do it automatically, you can manually break the design – just ensure there is a slight overlap or clear alignment points between sections. Print out templates of each section on paper at full size and use them to map out the design on your fabric. This visual aid helps you mark where each hooping needs to go.
On the fabric itself, draw registration marks or crosslines that will be used to align each hooping. These could be as simple as a vertical and horizontal center line across the large design area, or small crosshair marks at key points (often at the edges of where one section ends and the next begins). Some embroiderers will stitch these alignment crosses in the first hooping (in the margins of the design) so that when re-hooping for the next section, they can precisely align the hoop so the next part lines up with the previous stitching. Use a water-soluble thread or a basting stitch for these if you need to remove them later. When hooping each section, hoop the stabilizer and fabric carefully at the marked position. If the project is a large quilt or very bulky, you might float the fabric under the hoop and secure it with adhesive and pins because re-hooping a bulky piece can be challenging – just make sure those registration marks on fabric and stabilizer still line up perfectly to your hoop’s center or reference point. Take advantage of tools like endless embroidery features or positioning aids on your machine: some machines have an “endless” or border hoop function that lets you stitch a reference line or use a special continuous hoop for aligning repeating designs. Others, as mentioned in the placement tip, allow fine-tuning the design position in the hoop – useful if you need to nudge the second section a millimeter to join seamlessly with the first.
As you proceed through each segment of a multi-hoop design, go slowly and verify alignment at every step. It’s wise to do a test on scrap fabric for a multi-hooped design before the final item, to make sure your splitting and alignment method works. If you find a slight gap or overlap between sections, you can adjust your approach: sometimes adding a small overlap in the design split (where the two sections sew a few common stitches) can hide any misalignment. In continuous border designs, you might intentionally have an overlapping element like a satin line that stitches again in the next hooping to cover the transition. Finally, maintain consistency in stabilizer and hoop tightness between hoopings – if one section is hooped looser or the fabric shifted more, it can throw off the matching. With practice, multi-hooping opens up a world of large-scale designs like jacket back logos, big monograms, quilt embroidery, and elaborate borders that truly impress. Patience and precision are rewarded when your finished pieces show no obvious break between hoopings, creating one cohesive large embroidery.
6. Optimize and Edit Embroidery Designs for Better Results
Advanced embroiderers know that not all design files are created equal. Sometimes a stock design needs a bit of tweaking to truly stitch out perfectly on your specific fabric and machine. One invaluable tip is to optimize your embroidery designs through editing or intelligent adjustments before you press start. This often means looking at elements like stitch density, underlay, and pull compensation in the design. If you have embroidery software, open the design and inspect the stitch settings. For instance, a dense fill that is 0.3mm spacing might be too heavy for lightweight fabric – you can increase the spacing slightly or remove some fill stitches to prevent bulletproof, stiff embroidery and avoid puckering. Conversely, if you are embroidering on a plush towel, adding a knockdown stitch underlay (a light lattice fill under the design area) can help flatten the pile and keep details visible – you might manually add this in software if the design doesn’t include it. Underlay stitches in general are crucial for professional results: they stabilize the fabric and create a smooth foundation for top stitching. A well-digitized design will include appropriate underlay (like edge runs under satins and a fill underlay under large fill areas). If you notice your design has none, consider editing to add it; if it has underlay sticking out from edges, you might need to adjust or remove excessive underlay.
Pull compensation is another refinement: this feature slightly expands shapes in the design to account for the natural pull and shrinkage that happens when stitches lay down (especially on satins and on stretchy fabrics). If you find that outlines in your design are not aligning perfectly over fills (a common issue where the outline seems to “fall off” one edge), increasing pull compensation in the software can help – it will extend the fill or base shape so that when it pulls in, it still reaches the outline. Similarly, push compensation (adjusting for how much designs extend in the stitching direction) can be tweaked for very elastic materials to keep circles and shapes from warping. An experienced user will also look at the stitch order and color sequence in a design: does it minimize unnecessary color changes and jumps? Sometimes you can edit the sequence to be more efficient (for example, if a design does one part of a color, switches away, then comes back to the same color later, you might be able to group them to avoid an extra change – just be careful that doing so doesn’t cause layering issues). Many will also insert stop commands or pauses in a design for specific reasons, like adding an appliqué piece or placing a 3D foam, or simply to change a bobbin color for reversible work.
Resizing designs is another area where advanced knowledge is key. If you need to scale a design significantly (more than 10-20% in size), understand that the stitch count and density should be adjusted – merely enlarging on the machine might result in overly sparse stitches, while shrinking can bunch them up. Use software that recalculates stitches or manually adjust densities when resizing to maintain quality. Always test stitch your edited or customized design on a similar fabric before committing to the final piece. This test run will show if your changes achieved the desired effect (e.g., no puckers, better coverage, perfect outline alignment). It also lets you catch any lingering problems, like too-small details that don’t show up well or jumps that need trimming. Optimizing designs in this way is a hallmark of advanced embroiderers – rather than accepting a design “as is,” you tailor it to your project’s needs and your machine’s quirks, resulting in a smoother, cleaner stitch-out. Over time, you’ll even start anticipating design issues (like knowing a satin stitch border might pull a gap on the right side on pique fabric) and preemptively adjusting for them. This level of control elevates your work from ordinary to exceptional.
7. Explore Advanced Techniques: Appliqué Mastery and In-The-Hoop Projects
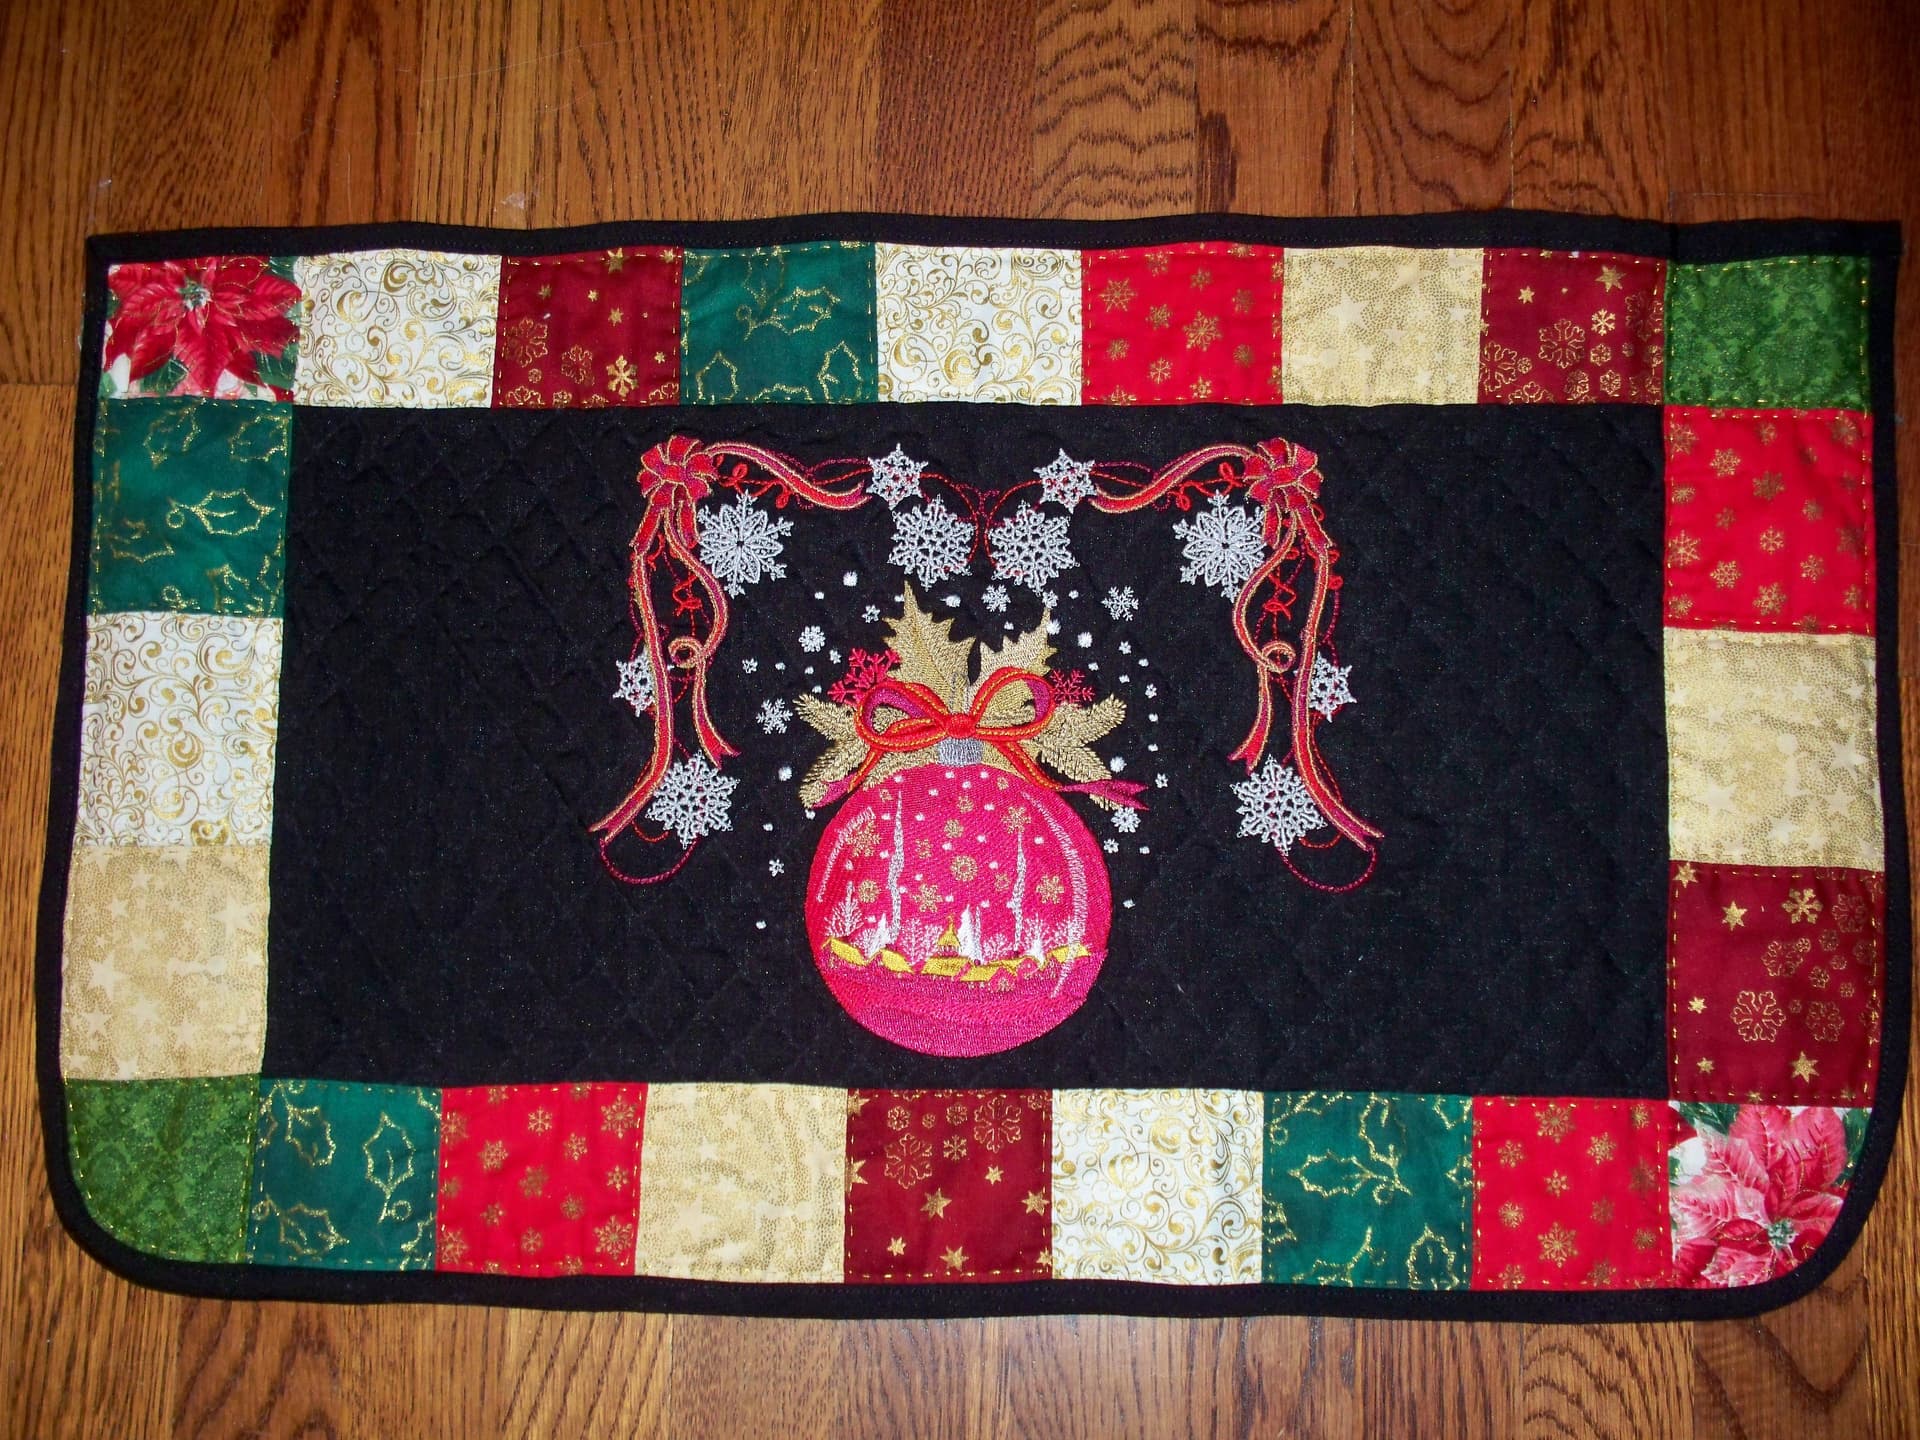
To add creativity and dimension to your embroidery projects, explore techniques like machine appliqué and in-the-hoop constructions. These are popular among experienced embroiderers because they combine sewing skills with embroidery for polished, professional outcomes. Machine embroidery appliqué involves stitching down pieces of fabric within an embroidery design to add texture and reduce stitch count. Mastering appliqué can greatly expand your design possibilities and create beautiful multi-fabric artworks. The typical process includes a placement stitch (an outline stitched on the hooped fabric showing where the appliqué fabric should go), then you place a piece of fabric over that area, followed by a tack-down stitch that secures the fabric, and finally a cover stitch (like a satin or decorative stitch) that neatly finishes the edge. For precise results, cut your appliqué fabric pieces accurately. You can do this by trimming in place after the tack-down stitch (using sharp appliqué scissors to cut excess fabric right up to the stitches) or by pre-cutting shapes. Advanced users often utilize die cutters or digital cutting machines to pre-cut applique pieces from the design’s vector files, ensuring a perfect fit. If you pre-cut, use temporary spray adhesive or a light fusible web on the back of the appliqué fabric to hold it in place before stitching the tack-down. This also helps prevent frayed edges and shifting. Another pro tip is to choose an appliqué fabric that complements your base and consider ironing on a fusible stabilizer or interfacing to the appliqué fabric beforehand – this keeps it from puckering and can prevent any show-through of the base fabric if it’s a high-contrast situation.
Troubleshooting appliqué comes down to careful technique: if you notice the edges of the appliqué fabric lifting after a wash, it could be that the tack-down missed the fabric (ensure your shape was placed correctly) or the cover stitch density was too low – you might want to increase satin width or use a slightly thicker thread for more coverage. If cutting in place, always pause the machine and take your time to trim cleanly; any little fabric nub left outside the tack-down will show, and trimming too close can accidentally clip the stitch. Some embroiderers use water-soluble stabilizer on top of appliqués (especially if the cover stitch is thin) to help the stitches lay smoothly over the edge of the fabric; this topping can be removed after stitching. With practice, your appliqué will look crisp and professionally inset, and it’s a fantastic way to mix prints and colors without stitching entire fill areas.
Beyond appliqué, In-The-Hoop (ITH) projects are another advanced avenue to explore. These are embroidery designs cleverly digitized to create items like quilt blocks, bags, key fobs, stuffed toys, and more entirely within the embroidery hoop. Essentially, the embroidery machine not only decorates but also does a form of sewing construction. To succeed with ITH projects, follow the instructions from the designer closely – they will tell you when to place fabric pieces, add backing, or insert zippers, etc. A few general tips: use tape or clips to hold materials that are placed in the hoop (for example, when adding a second piece of fabric right sides together for a zip pouch, tape it down so the embroidery foot doesn’t catch it). Keep the tape away from the stitch line and use a tape that’s easy to remove (painter’s tape or specialized embroidery tape works well, and won’t leave residue). Trim seam allowances and jump threads as instructed during the process, because once the project is closed up, you might not get another chance to clean those edges. It’s also wise to slow down your machine’s speed for final assembly stitches, especially if sewing through multiple layers like batting, lining, or thick materials in the hoop. When done carefully, ITH projects emerge from the hoop nearly finished – often you just turn them right side out or close a small opening. They can be incredibly rewarding and a testament to your embroidery prowess. By mastering appliqué and in-the-hoop techniques, you add valuable skills that let you create beyond flat designs: now you can compose intricate multi-fabric designs, and even construct functional items, all with your embroidery machine.

8. Tackle Metallics and Specialty Threads with the Right Setup
Embroidery isn’t limited to standard polyester or rayon thread – using specialty threads like metallics, glow-in-the-dark, holographic, or even 3D foam can add stunning effects to your projects. However, these come with their own challenges, so it’s important to adjust your technique to handle them. Metallic threads are notorious for shredding and breaking, but you can tame them with a few adjustments. First, use a metallic needle or a topstitch needle (size 90/14 is often recommended for metallics) – the larger eye and groove will reduce friction on the fragile metallic filament. Next, slow down your machine’s stitching speed when using metallics. High speed generates more heat and stress, which can cause the metallic strand to fray. Dropping to half-speed or so can dramatically improve stitch consistency. Loosen your top tension slightly as well; metallic threads do not forgive tight tension, and a slightly looser tension lets the thread feed smoothly without snapping. If your machine permits, you might also turn off automatic thread cutters for metallic runs, as the abrupt trim can sometimes pull the delicate thread out of the needle or create frayed ends – instead, plan to trim metallic jumps manually if needed.
Another tip for specialty threads is to change how the thread feeds. Metallic and other specialty threads (like sliver or holographic flat ribbon thread) tend to twist and kink. Using a thread stand placed a foot or two away from your machine allows the thread to unwind more gently and lose some of its twist before reaching the machine. Some embroiderers even thread the metallic through a small piece of sponge or use a net over the spool to add a bit of tension and prevent kinks. Ensure the spool orientation is correct: cross-wound metallic spools should sit on a vertical pin and feed off the side, whereas stacked (straight-wound) spools might do better on a horizontal pin to roll off. Watch out for design density when working with specialty threads – dense designs with tight stitch spacing are more likely to give trouble. If you plan a project with lots of metallic thread, choose or modify the design to have slightly longer stitch lengths and moderate density. Metallics shine (literally) in more open designs where they can catch the light, so you don’t need super tight stitches to get a great effect.
Beyond metallics, you may encounter other fun threads: glow-in-the-dark threads embroider much like regular polyester, so they are generally user-friendly – just remember they tend to be a bit thicker, so a needle size up (90/14) can help, and use a white bobbin thread to match the light color. Variegated threads create lovely color changes on their own; use them in designs with longer stitch runs to see the gradual shifts. They don’t require special handling, but be aware the color change is random, so plan for a unique look on each piece. There are also heavy 12 wt or wool blend embroidery threads that give a hand-stitched or chunky look; these definitely need a large needle (100/16, for instance) and a slow pace, plus designs digitized with longer stitches and more spacing. When using such heavy threads, you may also need to adjust the bobbin tension or even use a matching thread in the bobbin if the design is double-sided, because a standard fine bobbin thread might not hold a thick top thread well. Always test on scraps when venturing into a new thread type. Yes, specialty threads can be fiddly, but they’re often the element that takes a design from ordinary to extraordinary. With the right needle, tension tweaks, and patience, you can incorporate all sorts of dazzling threads into your embroidery repertoire without fear.
9. Embroider Difficult Fabrics with Confidence
Advanced embroiderers don’t shy away from challenging materials – they just adapt their approach to conquer them. Whether it’s leather, vinyl, silk, stretchy knits, or thick and fluffy textiles, each material has its own quirks. The trick is to choose the right stabilizer, needle, and design to match the material. Leather and vinyl require special care because a needle will pierce permanent holes and overly dense designs can perforate them like a paper punch. For these, pick designs with more open fill or bean stitches rather than dense full coverage; avoid very small lettering or tight clusters of stitches that might cause the material to tear. Use a sharp needle (generally size 80/12 or 90/14, and some recommend a leather needle which has a wedge point to cut cleanly) to make precise holes. A thinner needle (70/10 sharp) can be used on delicate garment leather to minimize hole size. It’s usually best to float leather or vinyl on a sticky stabilizer rather than hooping it conventionally – hooping can leave clamp marks or hoops burns on these materials. A medium-weight tear-away stabilizer is often sufficient since leather/vinyl are stable on their own (and tear-away is easier to remove cleanly from the back of leather). If the embroidery will endure stress (like on a motorcycle jacket), a cutaway stabilizer can be used for strength, but try to trim it close to the design edge so it doesn’t show. Also consider topping: a piece of translucent water-soluble film on top can help the foot glide and prevent any sticking on vinyl, and it keeps stitches from sinking if the leather has any soft grain.
For stretchy or knit fabrics (t-shirts, sweaters, jerseys), the mantra is: stabilize, stabilize, stabilize. Always use a quality cutaway stabilizer on knits – unlike tear-away, cutaway will remain to support the stitches during wear and laundry, keeping the design from stretching out. No-show mesh cutaway is a popular choice for garments because it’s soft and less visible from the back. Pair that with a light water-soluble topping on textured knits (like pique polo shirts or fleece) to prevent stitches from getting lost in the texture. Use a ballpoint needle so you don’t cut the knit fibers, and make sure to hoop the knit without stretching it out of shape. In fact, many advanced users will hoop only the stabilizer and then use a basting stitch to secure the knit fabric in place in its natural, un-stretched state. This way, when the embroidery is done and the basting is removed, the knit fabric can relax without warping the design. If your embroidered knit shows distorted outlines or gaps, that’s a sign the fabric moved – either the stabilizer wasn’t firm enough (try a heavier cutaway or two layers) or the fabric wasn’t held taut. Sometimes applying a temporary fusible stabilizer or starch to the fabric before hooping can add extra stability for hard-to-hoop stretchy materials.
When it comes to sheer or lightweight fabrics like organza, chiffon, or tulle, the challenge is to avoid puckering and visible stabilizer. In these cases, a water-soluble stabilizer is your friend: hoop a layer (or two for dense designs) of wash-away stabilizer and embroider the sheer fabric with it, then dissolve the stabilizer so that nothing remains. You’ll want sharp fine needles (65/9 or 70/10) and lighter designs (maybe redwork-style or bean stitch designs) for sheers so as not to overwhelm the fabric. If the design is heavier, consider using a tulle or organza as a permanent backing – embroider on the sheer fabric layered over a piece of fine netting; the netting will provide invisible support and can be trimmed close to the design. Pile and nap fabrics (towels, velvet, faux fur) present the issue of the pile poking through the embroidery. The solution is a topper plus possibly a knockdown stitch: always cover the area with water-soluble topping to hold down the pile for the stitches, and use a knockdown underlay (a light stitched shape that flattens the pile where the design will go) if the design is small or highly detailed on a very plush fabric. Also, be mindful of hoop pressure on napped fabrics like velvet – use a buffer material or consider floating to avoid crushing the pile outside the embroidery area (hoop burn on velvet is almost impossible to remove, but floating with adhesive stabilizer can circumvent hoop marks entirely). For thick, multilayer projects like quilting samplers or finished items like caps and bags, you may need machine-specific accessories. Caps, for example, are best done on a machine with a cap frame that holds the hat’s curve; if you attempt on a single-needle flatbed, stick to designs in the front two-thirds of the cap and use a curved hoop or DIY method to hold it, and always use a heavy cutaway cap backing plus sharp needle to penetrate the tough layers. Heavy fabrics like canvas or denim can take dense designs well, but use sturdy needles and perhaps slow down to handle the thickness.
In summary, every material can be embroidered beautifully if you pair it with the right setup. When trying a new or tricky fabric, do a small test design first. You’ll quickly learn what combination of stabilizer, needle, topping, and design density yields the best result. Advanced embroiderers build up a mental library of “recipes” for different materials – soon you’ll know exactly how to approach that stretch satin dress fabric versus a chunky bath towel, and you won’t hesitate to take on any material that comes your way.
10. Maintain and Calibrate Your Machine for Peak Performance
An often undervalued “trick” in the embroidery world is simply keeping your machine in top condition. Experienced users know that regular maintenance and occasional calibration of your embroidery machine can prevent a host of problems and ensure consistently high-quality output. Start with the basics: clean your machine routinely. Embroidery generates lots of lint and tiny thread bits, especially from stabilizer and high-speed stitching. After every project or two, take a few minutes to remove the needle plate (if possible) and use a soft brush or vacuum tool to clear out lint from the bobbin area, race, and under the feed dogs (for combo machines). A clean machine runs smoother and avoids thread jams caused by stray fuzz or broken thread pieces. Oiling the machine’s hook/bobbin race is another critical task for many models – check your manual for how often and where to oil. A drop of sewing machine oil in the hook race (or in designated holes for some machines) every few embroidery hours will keep the rotation smooth and quiet. Just be sure to use the correct oil and never over-oil (one drop is usually enough); wipe off any excess to avoid it getting on your project.
Pay attention to parts that wear out or require periodic checks. The needle, as mentioned earlier, should be changed frequently. The bobbin case tension might also need a slight tweak occasionally: if you notice your bobbin thread tension has changed (perhaps after using a different bobbin thread brand or a particularly long run), use the tiny screw on the bobbin case to adjust it back to baseline. Some advanced embroiderers keep a second bobbin case – one adjusted slightly tighter or looser – for different scenarios (for example, one for standard embroidery and one for when using thicker specialty threads or when you intentionally want more or less bobbin pull). It can be handy to have your bobbin case professionally calibrated now and then if you suspect tension issues that you can’t resolve via the top thread alone. Software/firmware updates for modern computerized machines are also important; manufacturers often release updates that fix small bugs or improve embroidery functions, so keep an eye on those and update your machine’s firmware when available to benefit from any enhancements in stitch quality or functionality.
Beyond cleaning and oiling, overall machine calibration should be considered. Over time and heavy use, things like the embroidery arm’s alignment or the needle bar timing can drift slightly. If you see persistent registration issues (designs consistently skewing in one direction, or outlines always off in the same corner) despite proper hooping and stabilizing, your machine might need a service technician to calibrate the embroidery module or check the hoop alignment. Some higher-end machines have self-calibration tools – for instance, they might stitch a test design that you can measure to adjust the X/Y calibration. Utilize these features if available. Also, keep your machine physically stable: heavy embroidery causes vibration, so use a solid table and consider anti-vibration pads. This prevents the machine from “walking” slightly during stitching, which can affect registration on very sensitive detail. Keep your embroidery machine clean externally as well, covering it when not in use to prevent dust accumulation in ports and moving parts. Check and change the needle plate if it’s nicked or the bobbin case if it’s got burrs (rough spots can shred thread). By treating your machine to regular TLC, you’ll avoid headaches like frequent thread breaks (often caused by debris or burrs), poor tension (lint in discs or worn check springs), and even costly repairs. A well-maintained and calibrated machine means you can focus on creativity and technique, knowing that the equipment will reliably execute your vision stitch-for-stitch. Happy stitching, and here’s to achieving ever more professional results with these advanced practices!

